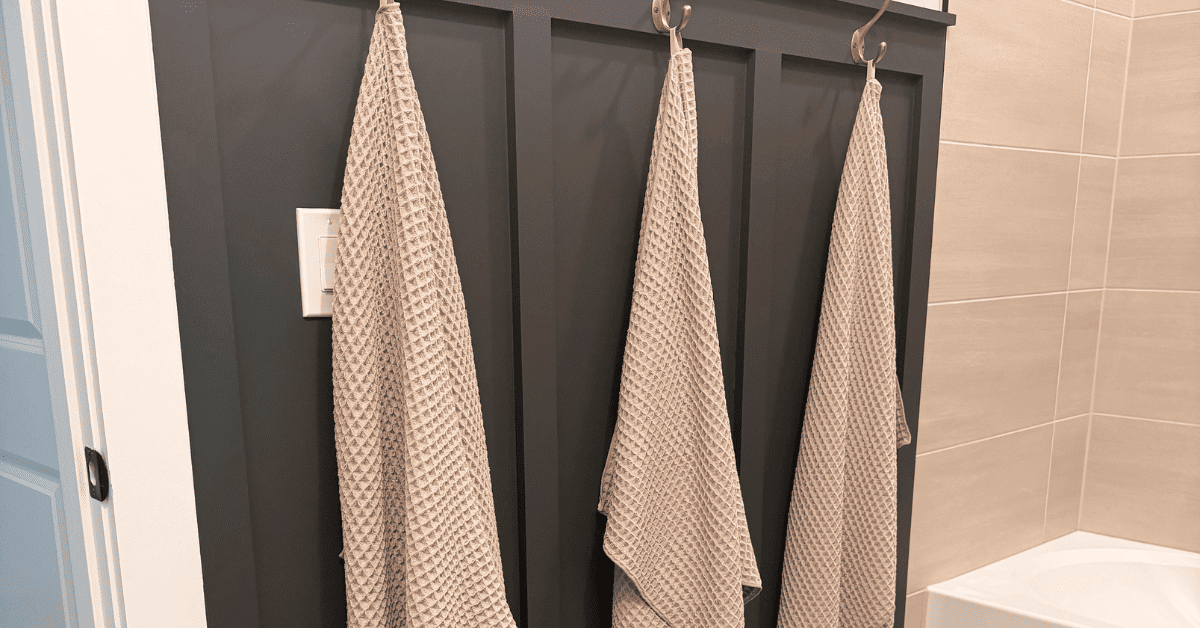
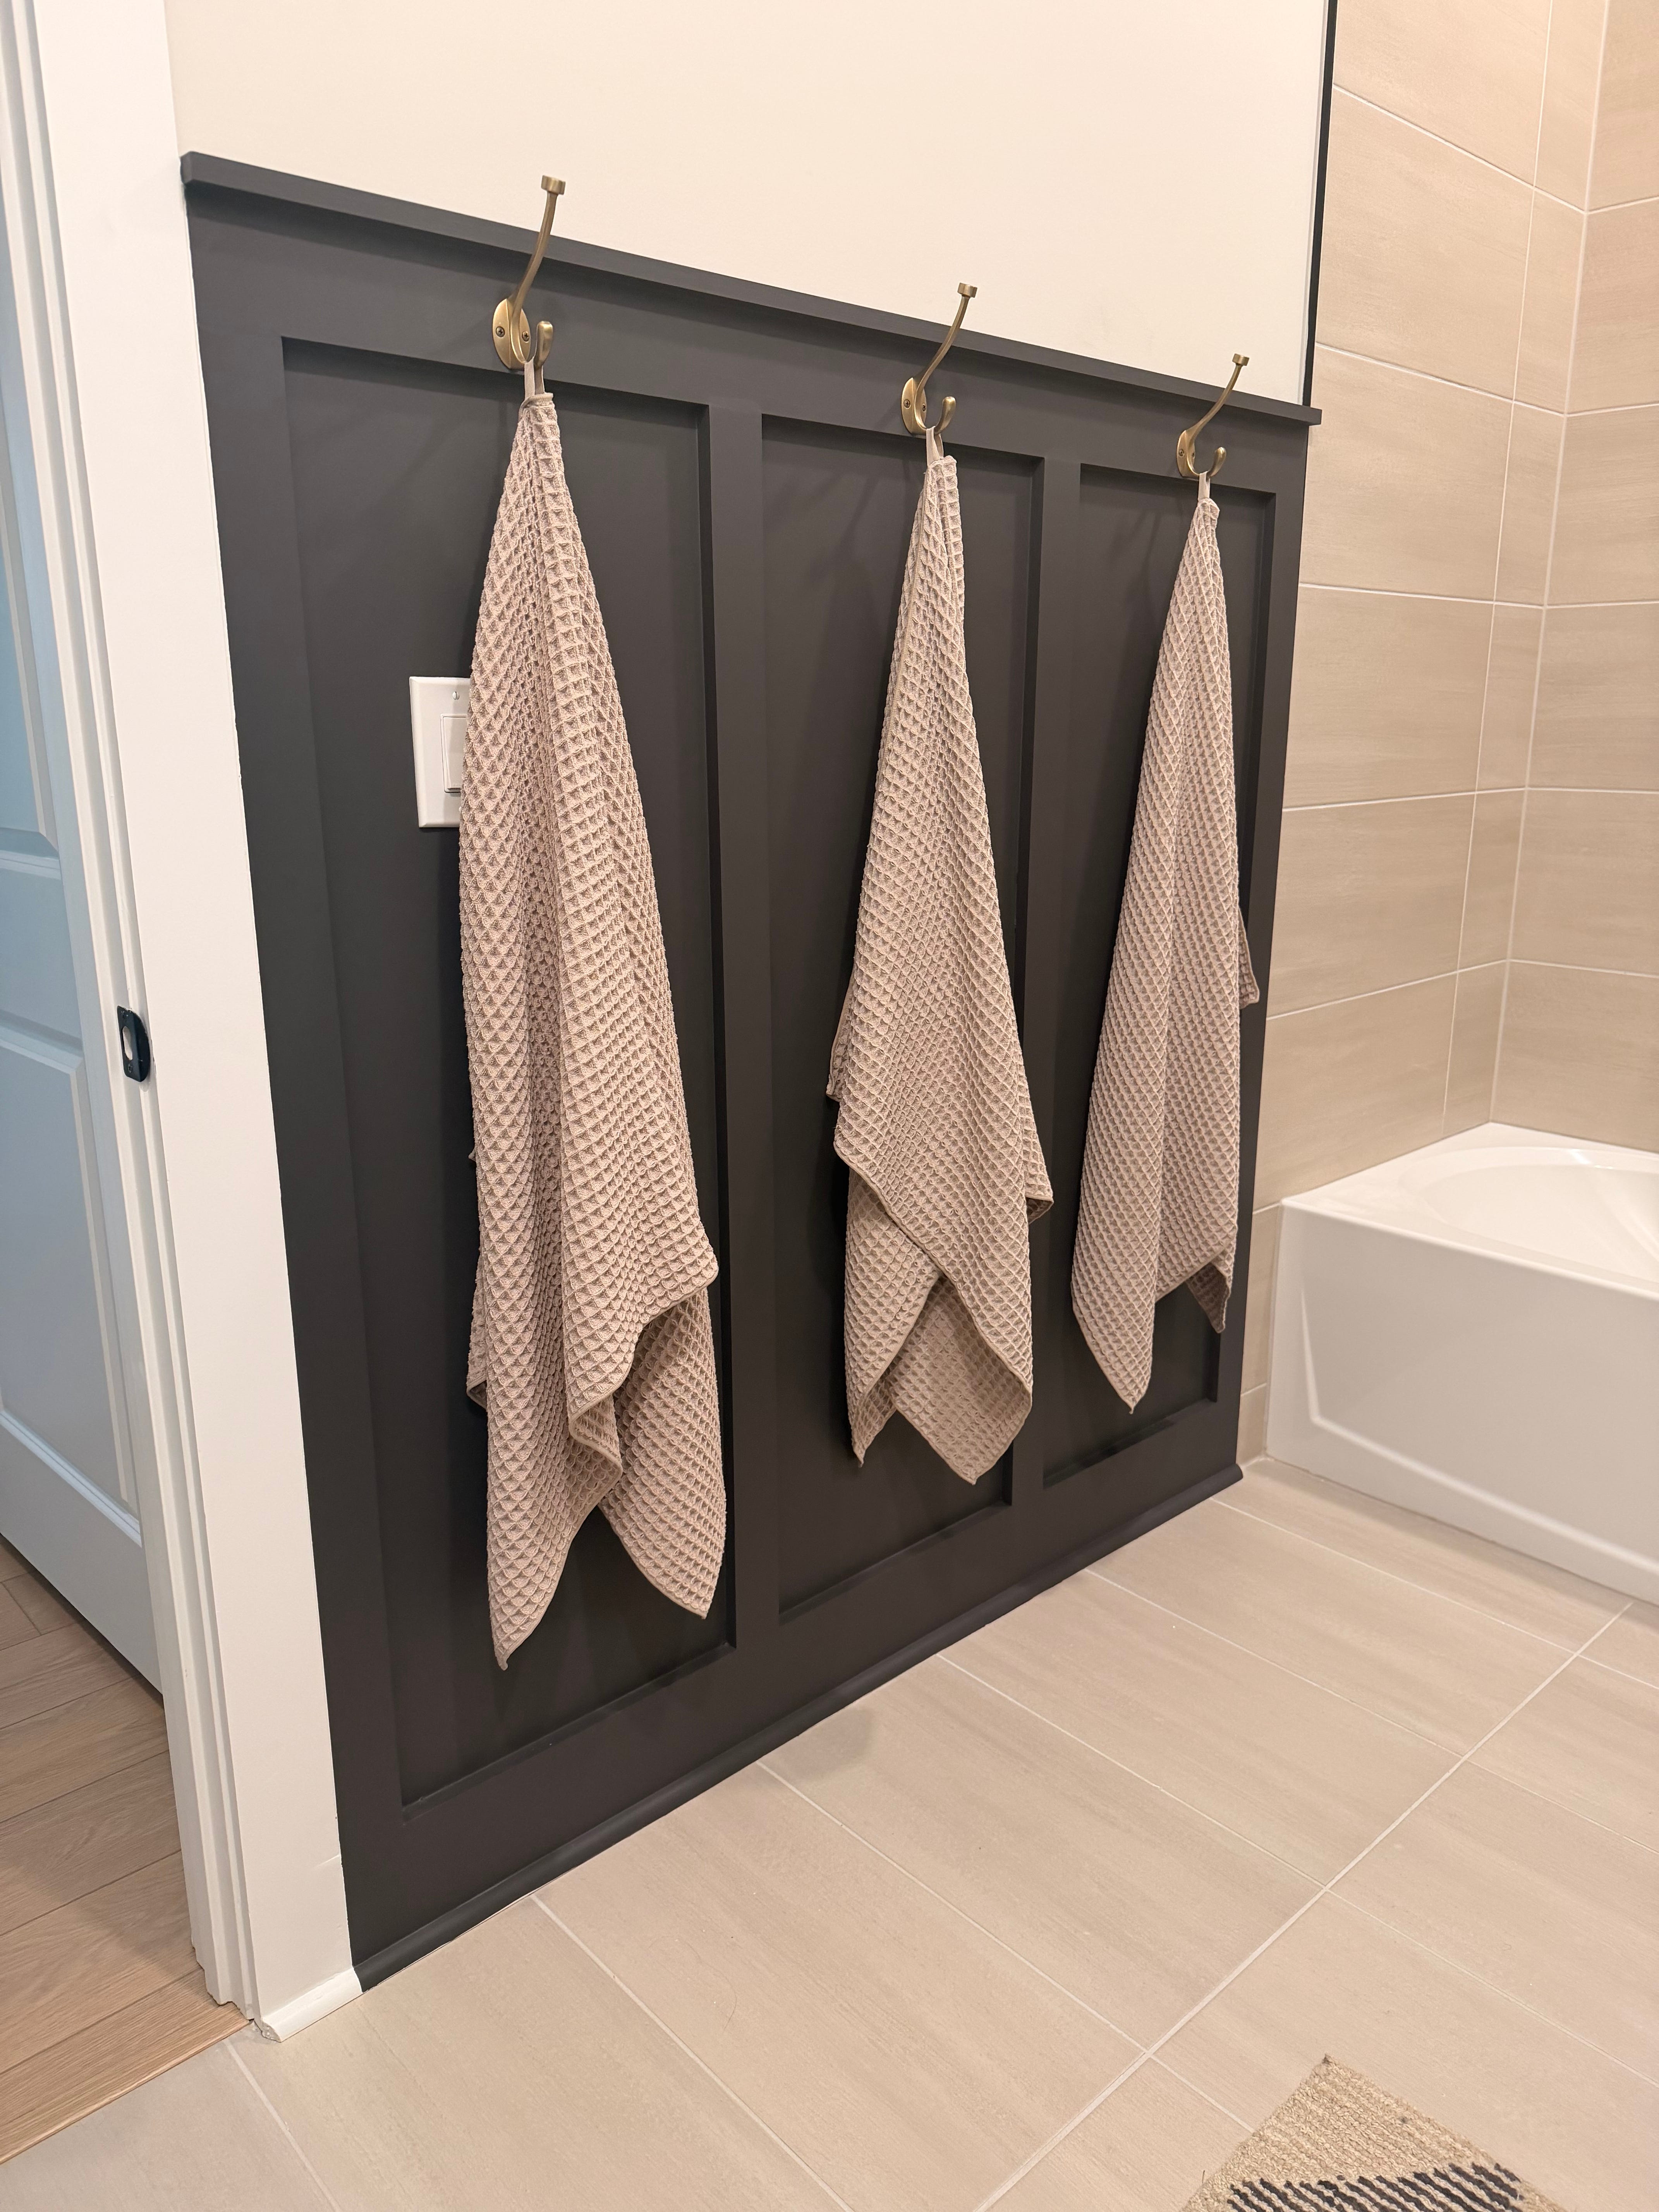
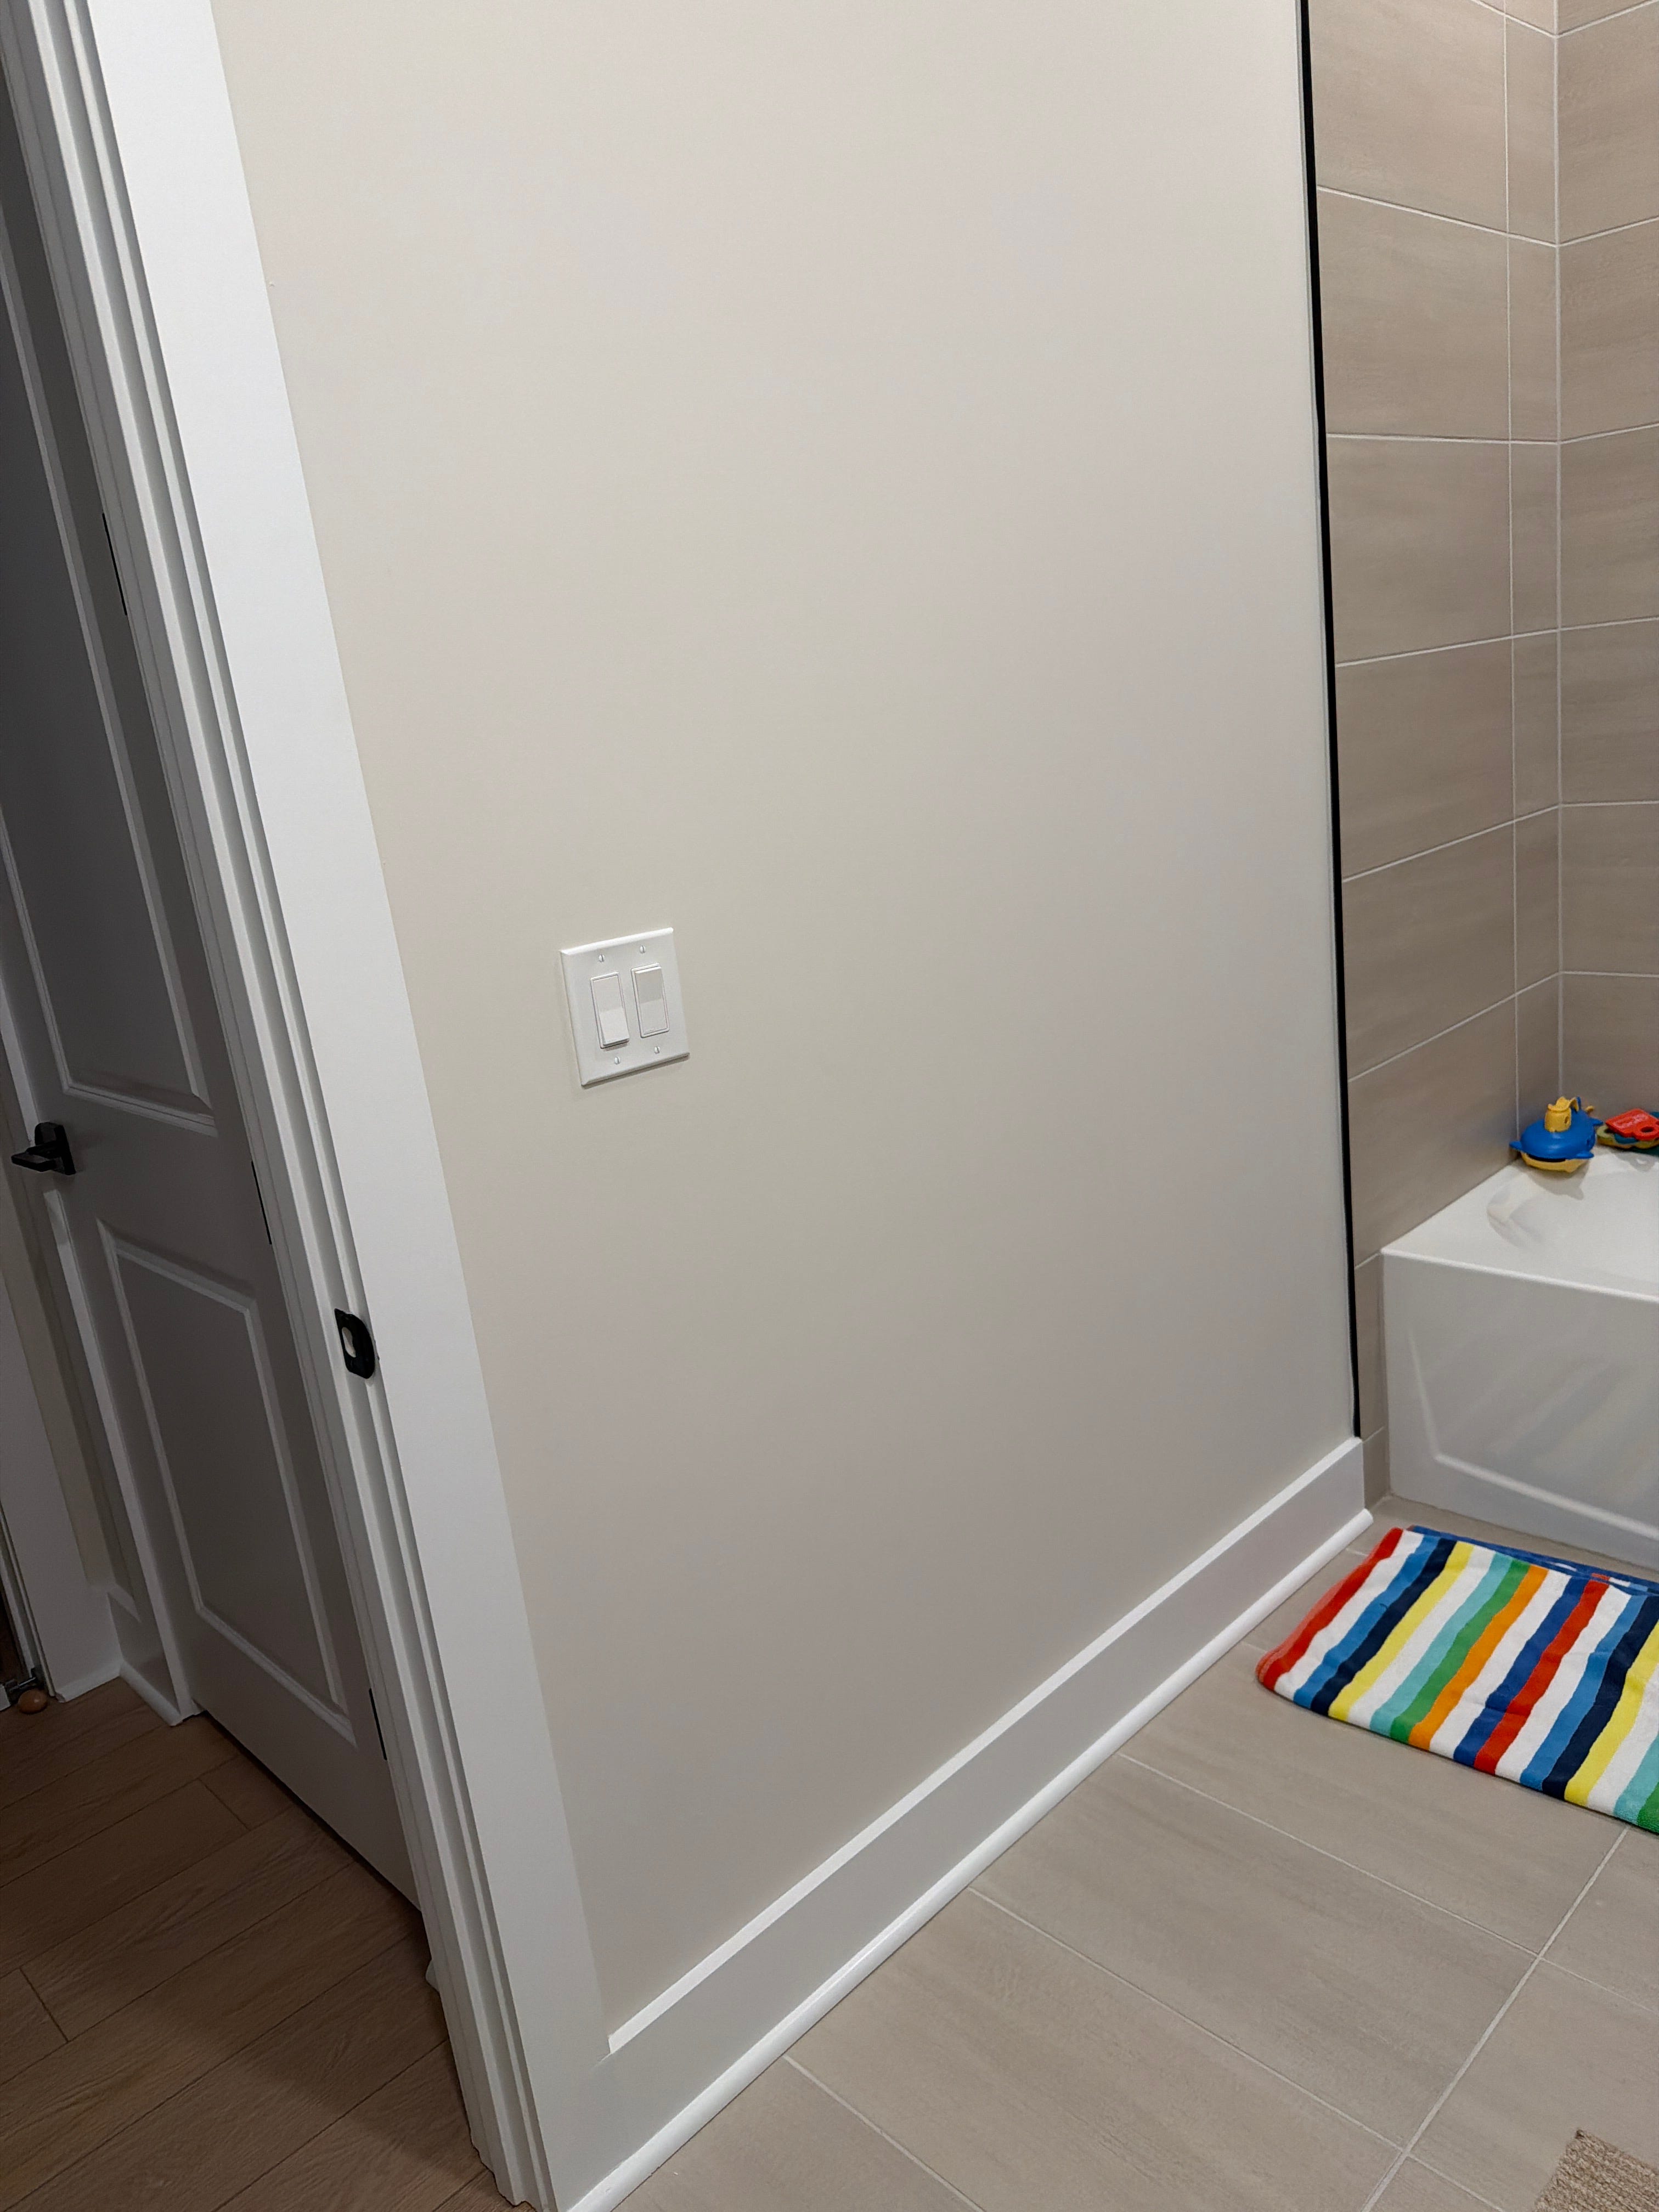
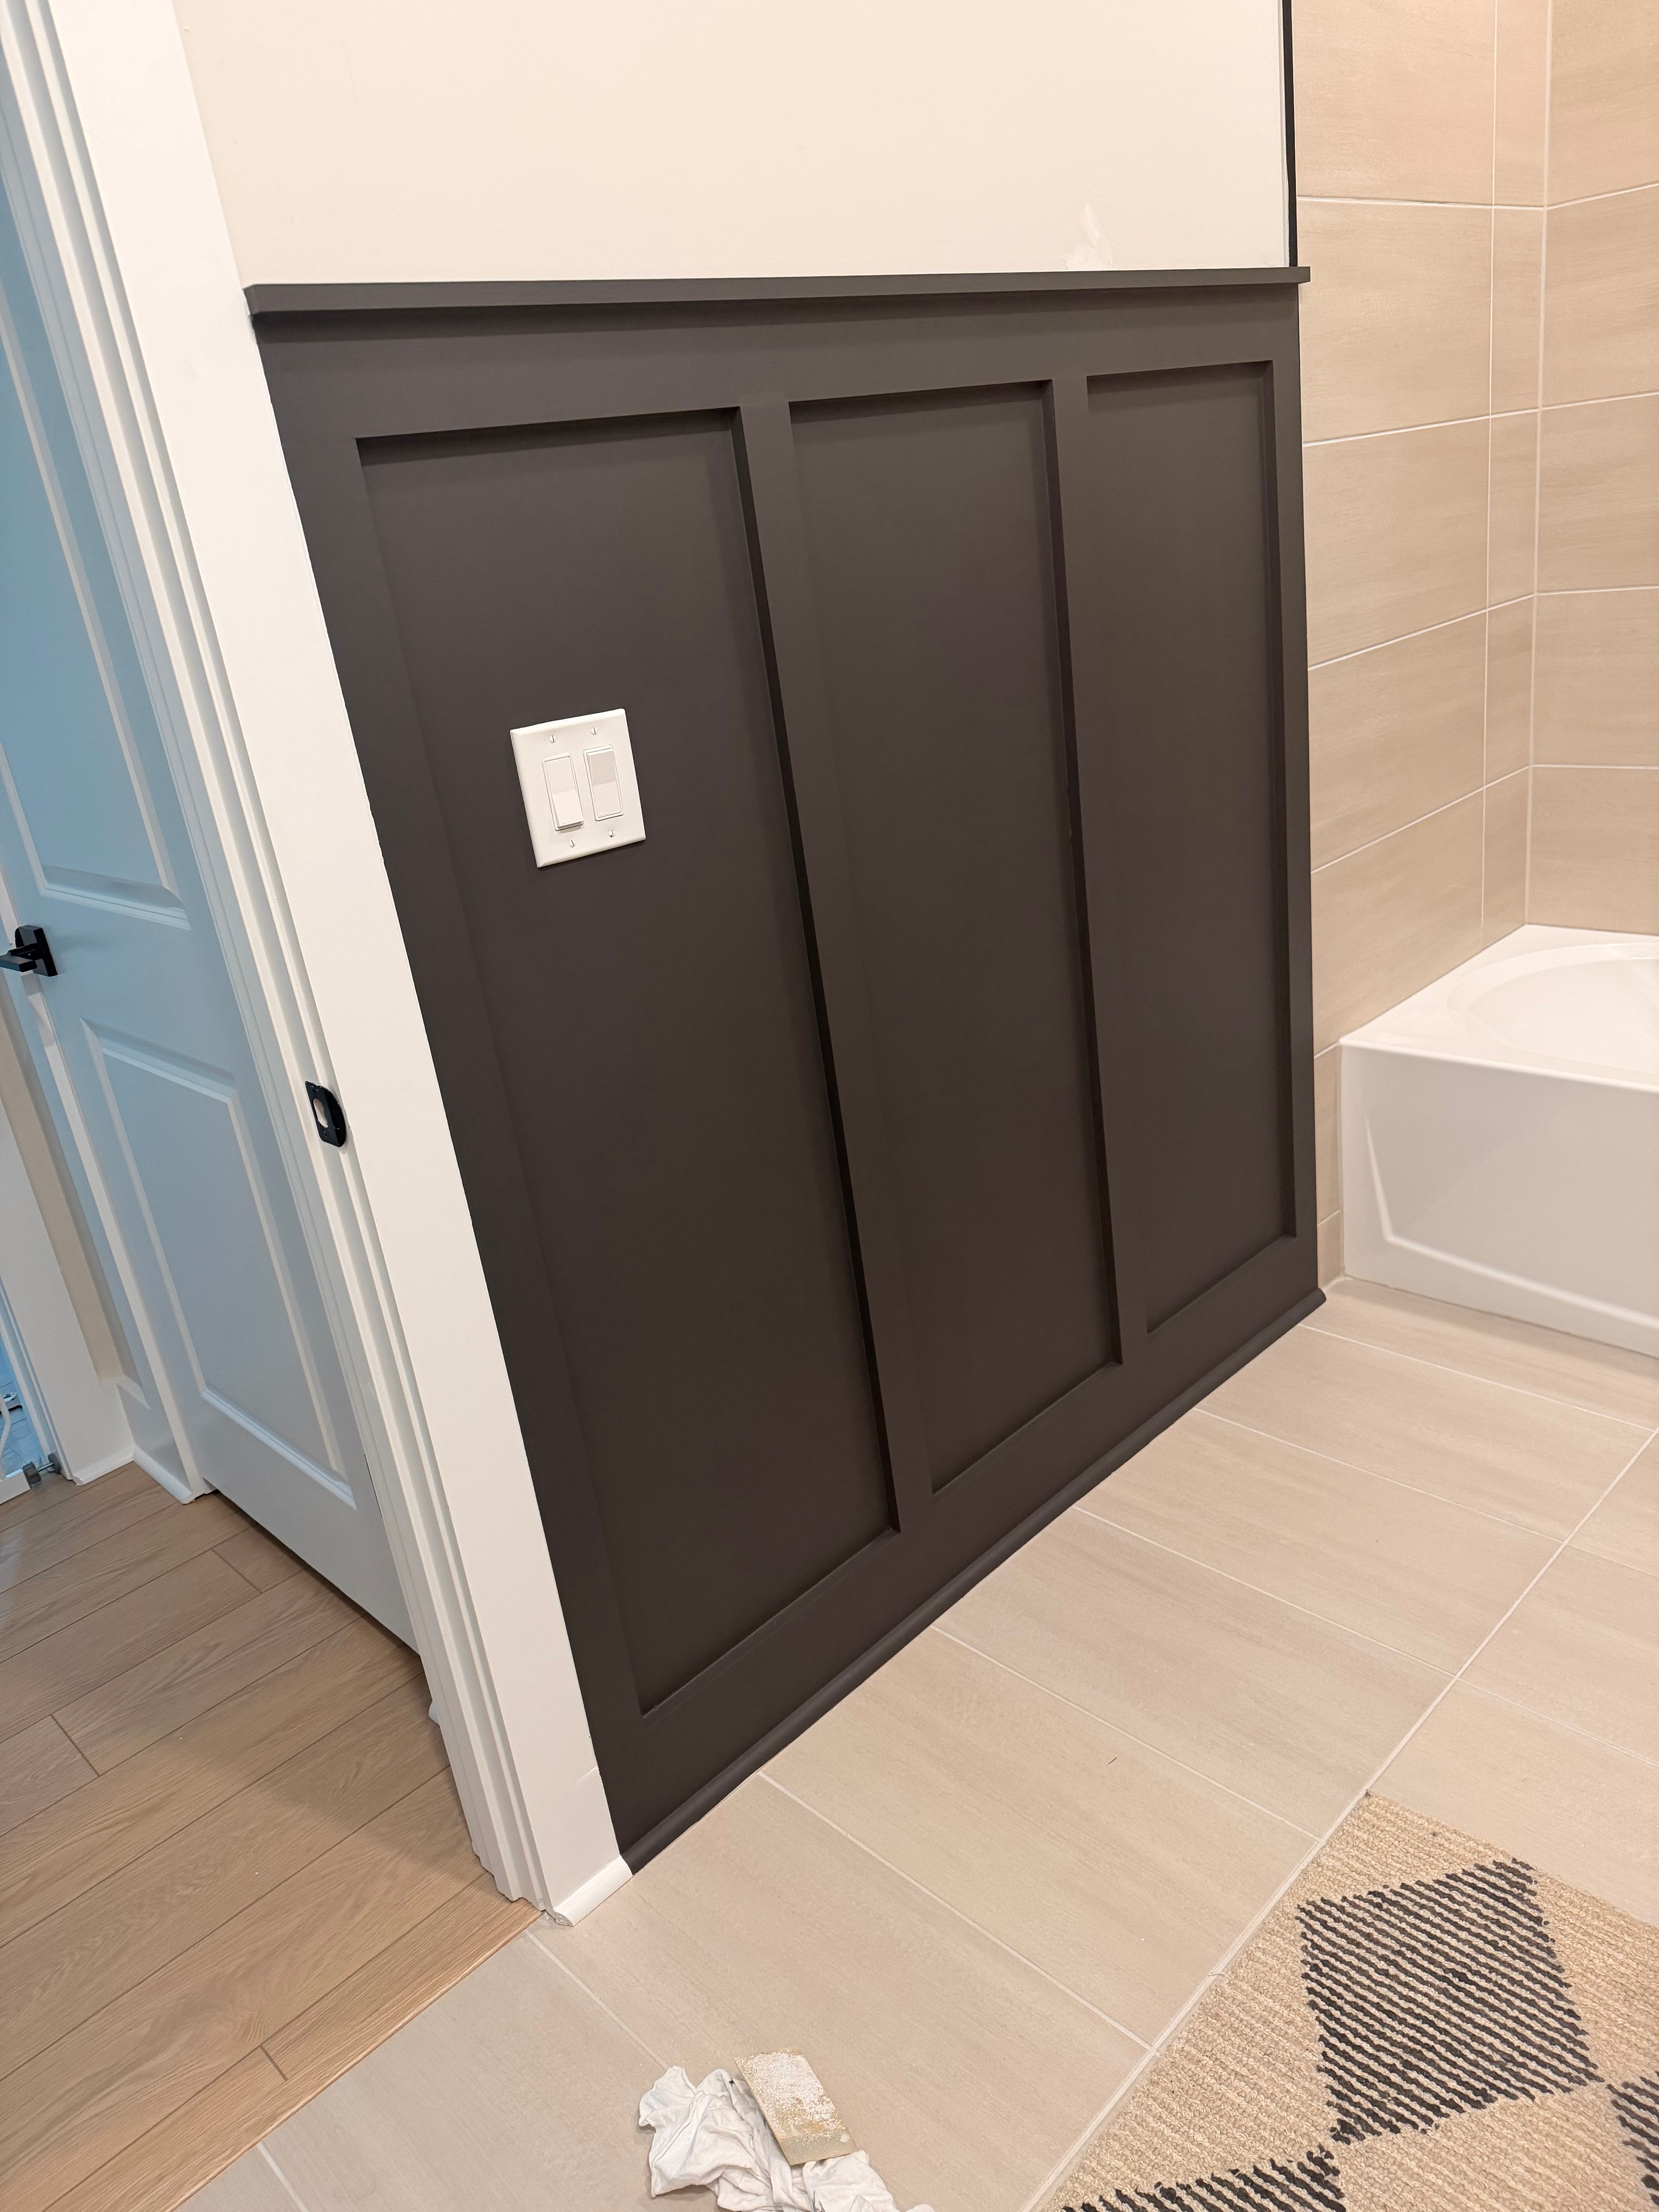
We had this big, tall, empty black wall in my daughter’s bathroom, and I knew I needed to do something with it… but I didn’t want to just do a basic towel bar. I wanted something that felt more custom and had a little more character.
This batten wall completely transformed the space, and I’m not exaggerating when I say this is one of the easiest DIY projects I’ve ever done.
And coming from me, that says a lot, because I am not super handy lol.
If I can do this, you can do this. I promise
The Before Photo
Excuse my daughters bath toy mess lol
What I Used
I kept this super simple:
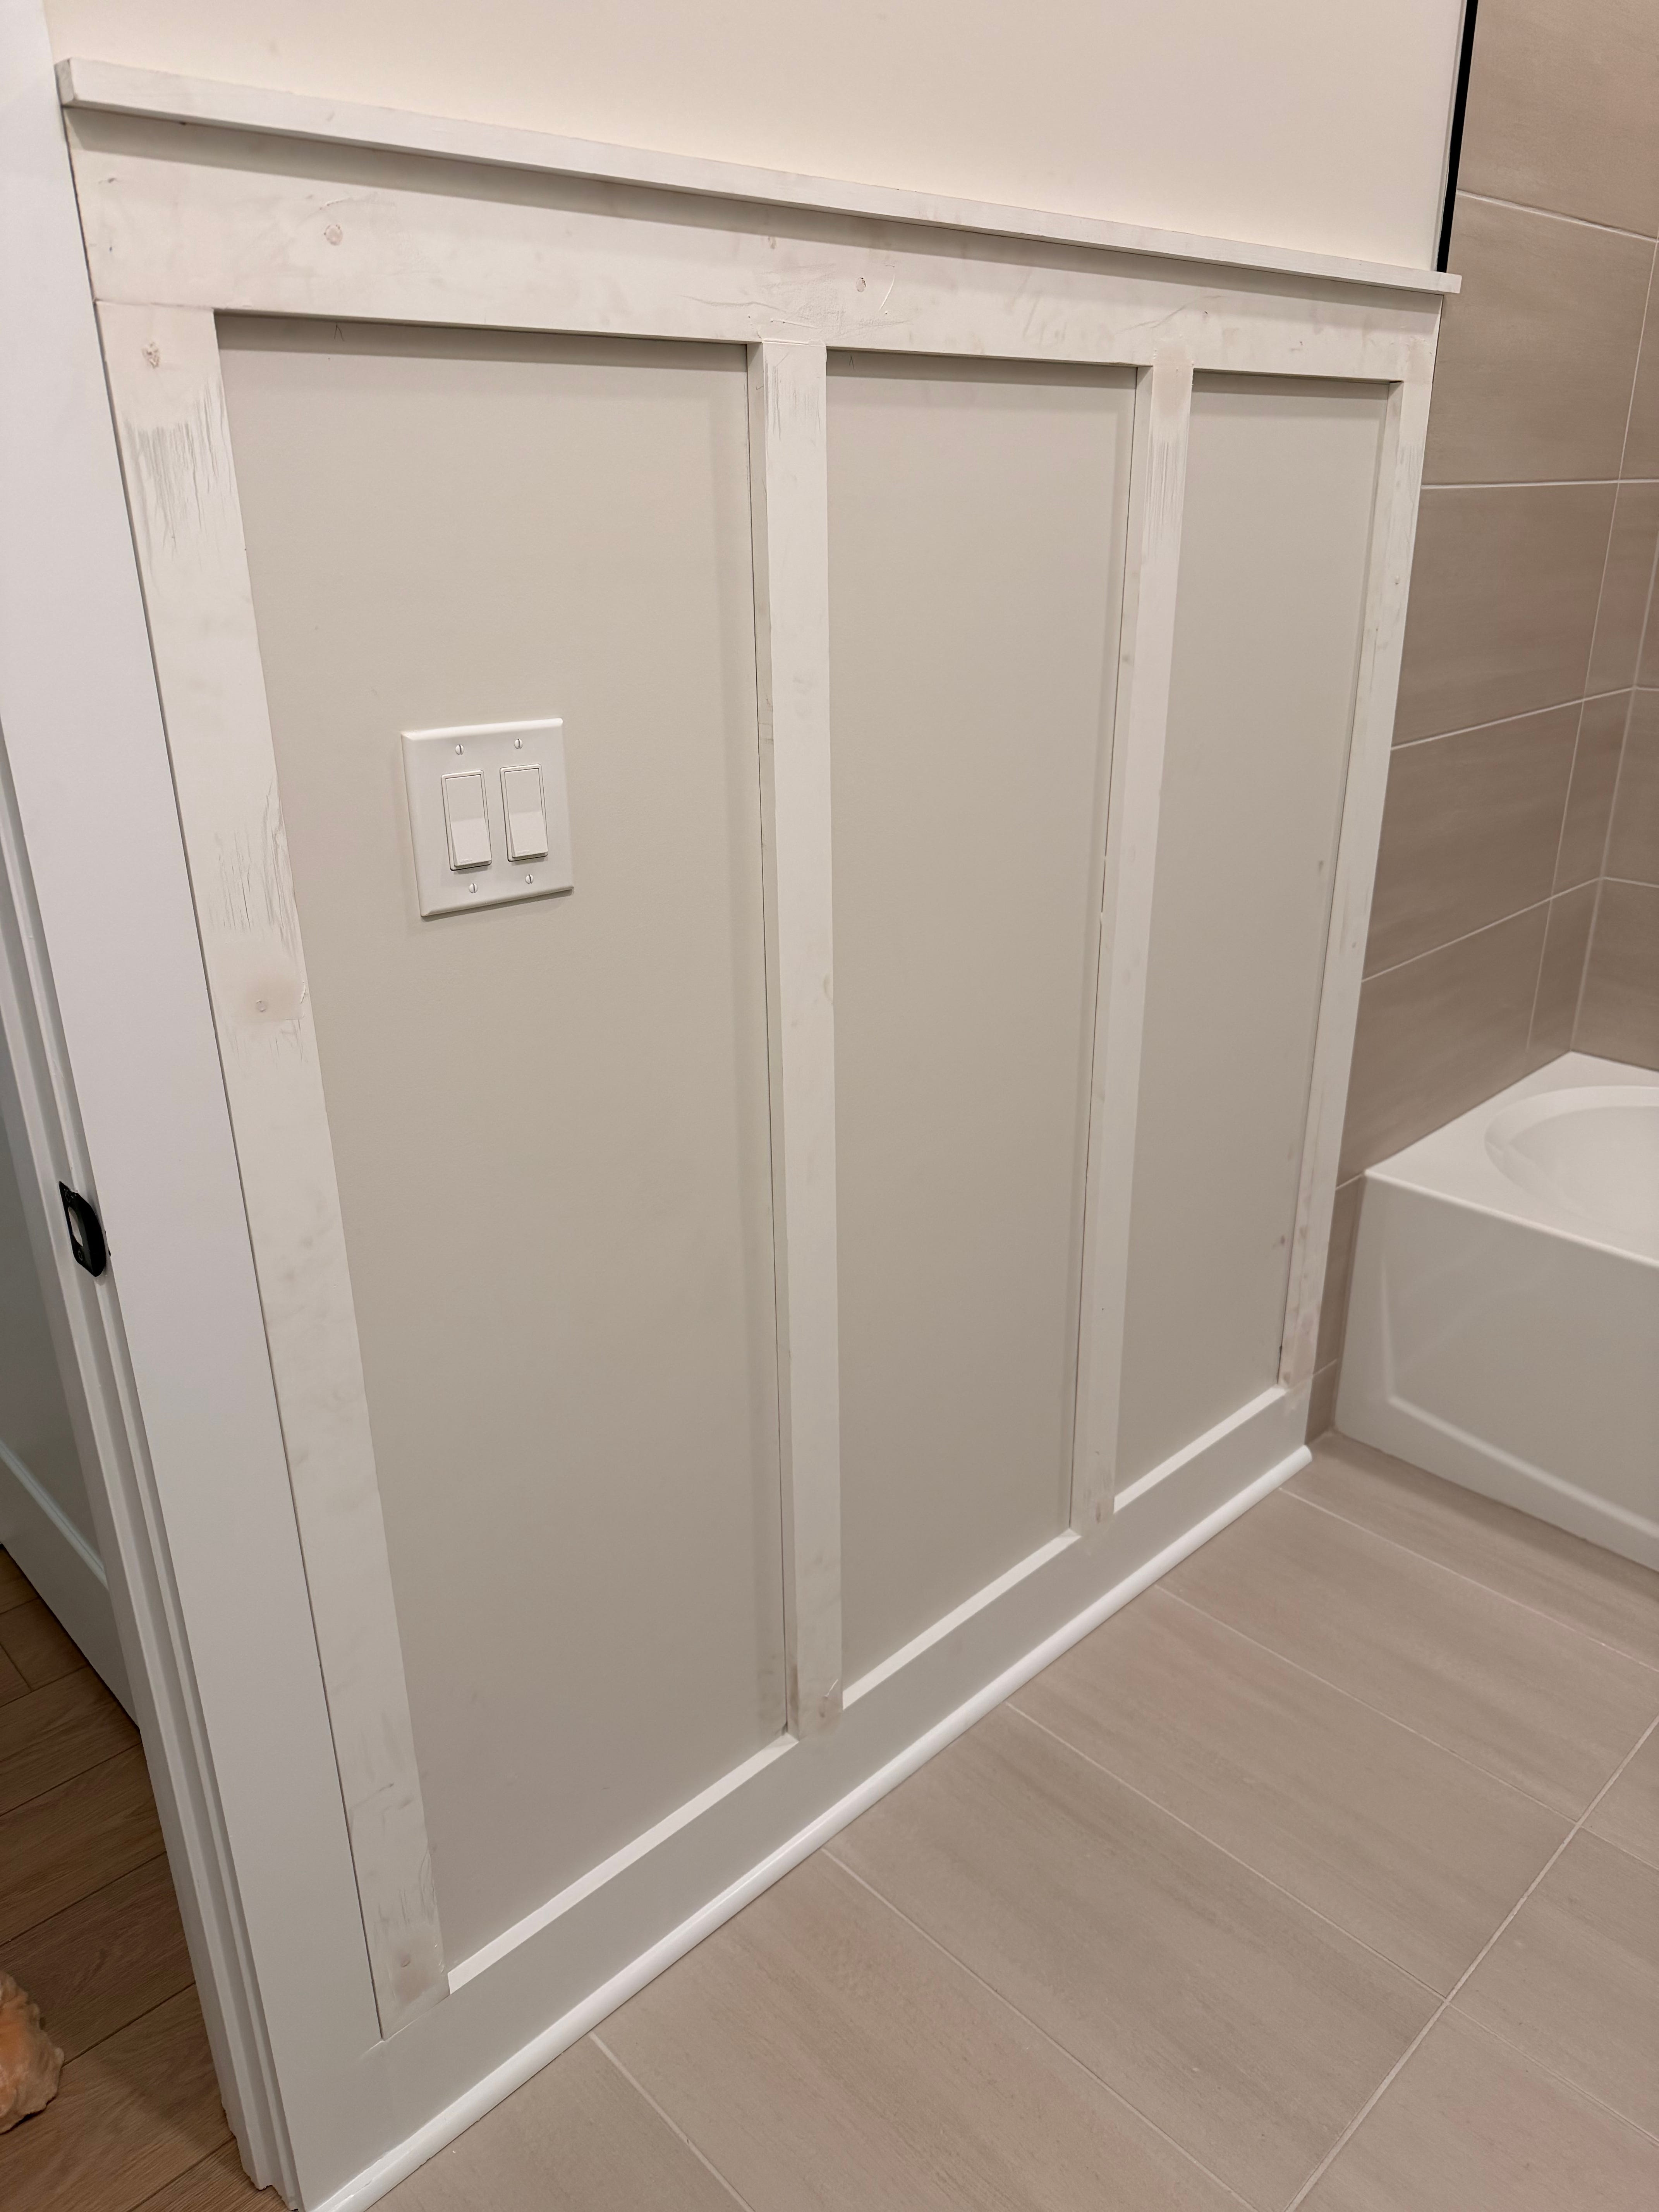
- 1×3 boards for vertical battens
- 1×4 board across the top
- 1×2 board flipped sideways for the top ledge
- Existing baseboards (did not remove)
That’s it.
I linked all the exact products I used here: https://shopmy.us/shop/collections/4515432
For reference, I have 10 foot ceilings, so I wanted the batten wall to be taller to match the scale of the room and also to hang towels high enough off the ground.
My top ledge ended up at exactly 61 7/8 inches for reference.
Why I Kept My Baseboards
Instead of removing my baseboards, I just built on top of them.
My 1×3 boards sat perfectly flush on my baseboards, and I added a few shims where needed to make everything line up clean.
This saved time and made the project way easier.
Step-by-Step Instructions
1. Measure + Cut Your Wood
Plan your spacing and have your boards cut ahead of time.
I intentionally spaced my battens so they would land on studs. This made everything more secure.
2. Install the Vertical Boards (1x3s)
I used long screws instead of a brad nailer and drilled directly into the studs, but you can do either one.
Each board only needed 2-3 screws to feel secure.
Yes, the holes are bigger than nails, but you’re filling and sanding anyway, so it really doesn’t matter (in my mind at least).
3. Add the Top Board (1×4)
Next, install your 1×4 horizontally across the tops of the vertical boards.
4. Add the Ledge (1×2)
Then attach your 1×2 flipped sideways on top of the 1×4 to create that ledge detail.
This is what really makes it look finished.
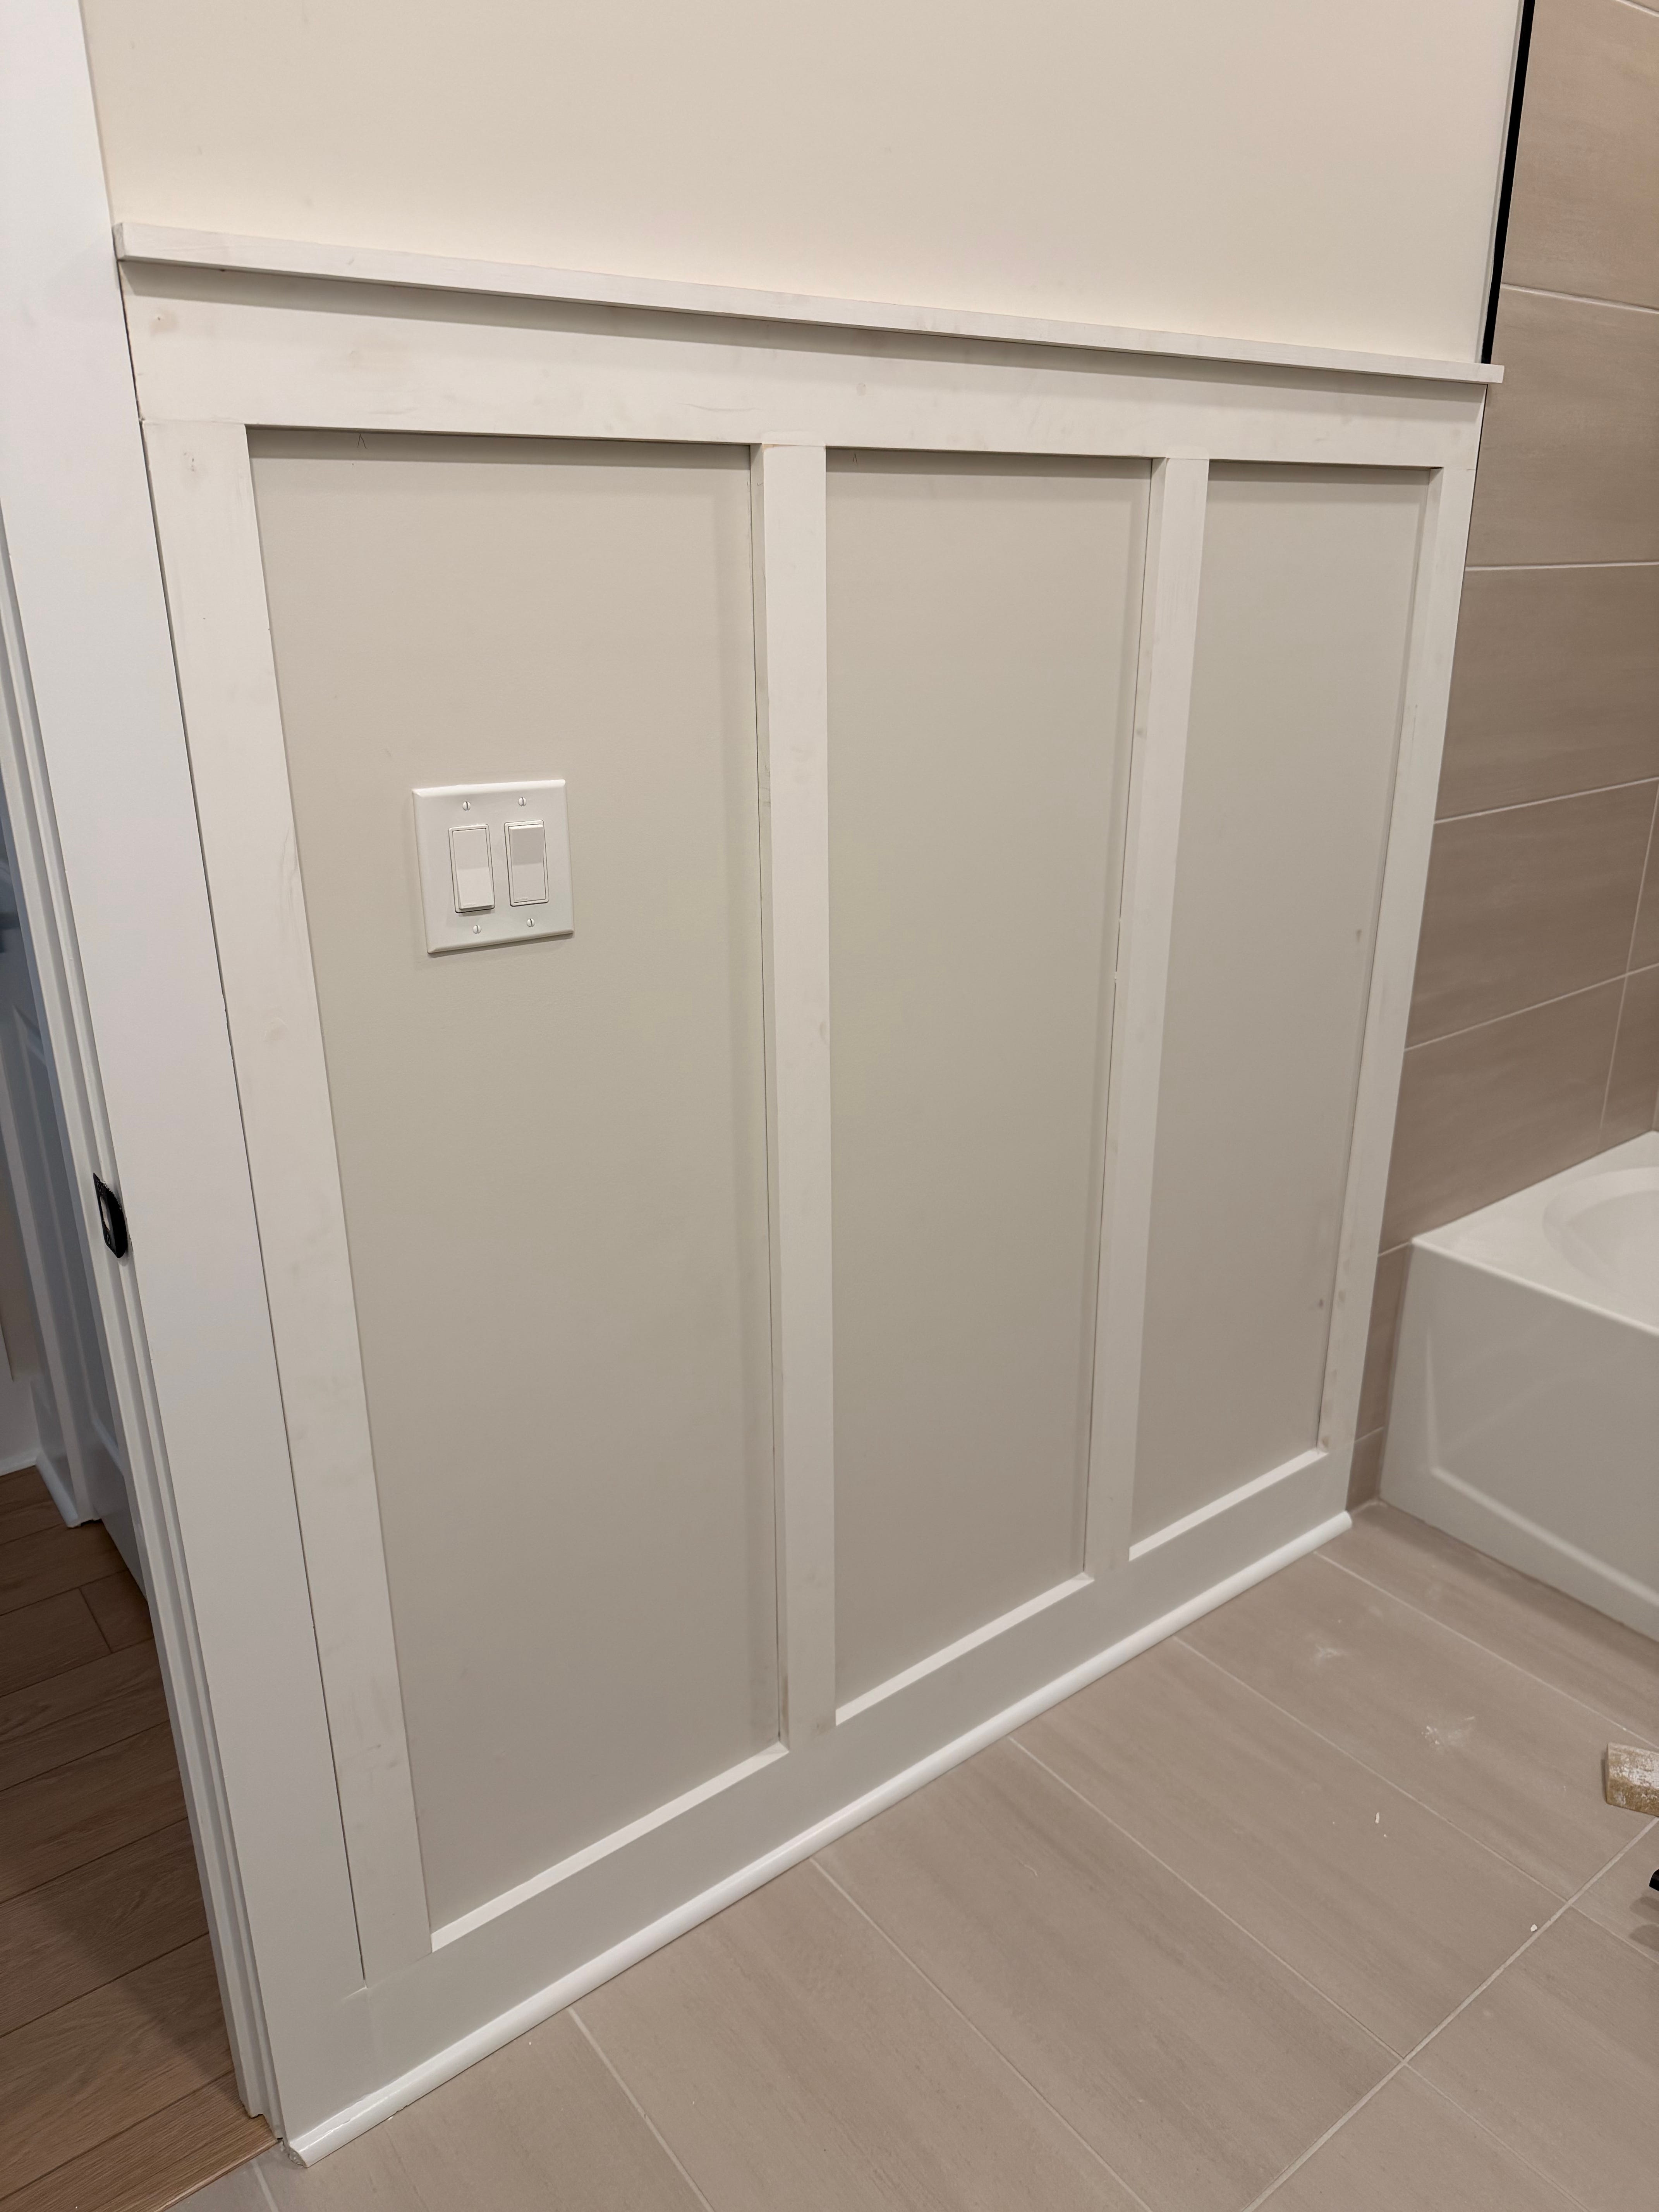
5. Fill + Sand
Fill all holes and seams between battens with drywall putty and sand everything smooth. Now a pro may tell you to use wood filled lol but drywall putty is so much easier to sand down.
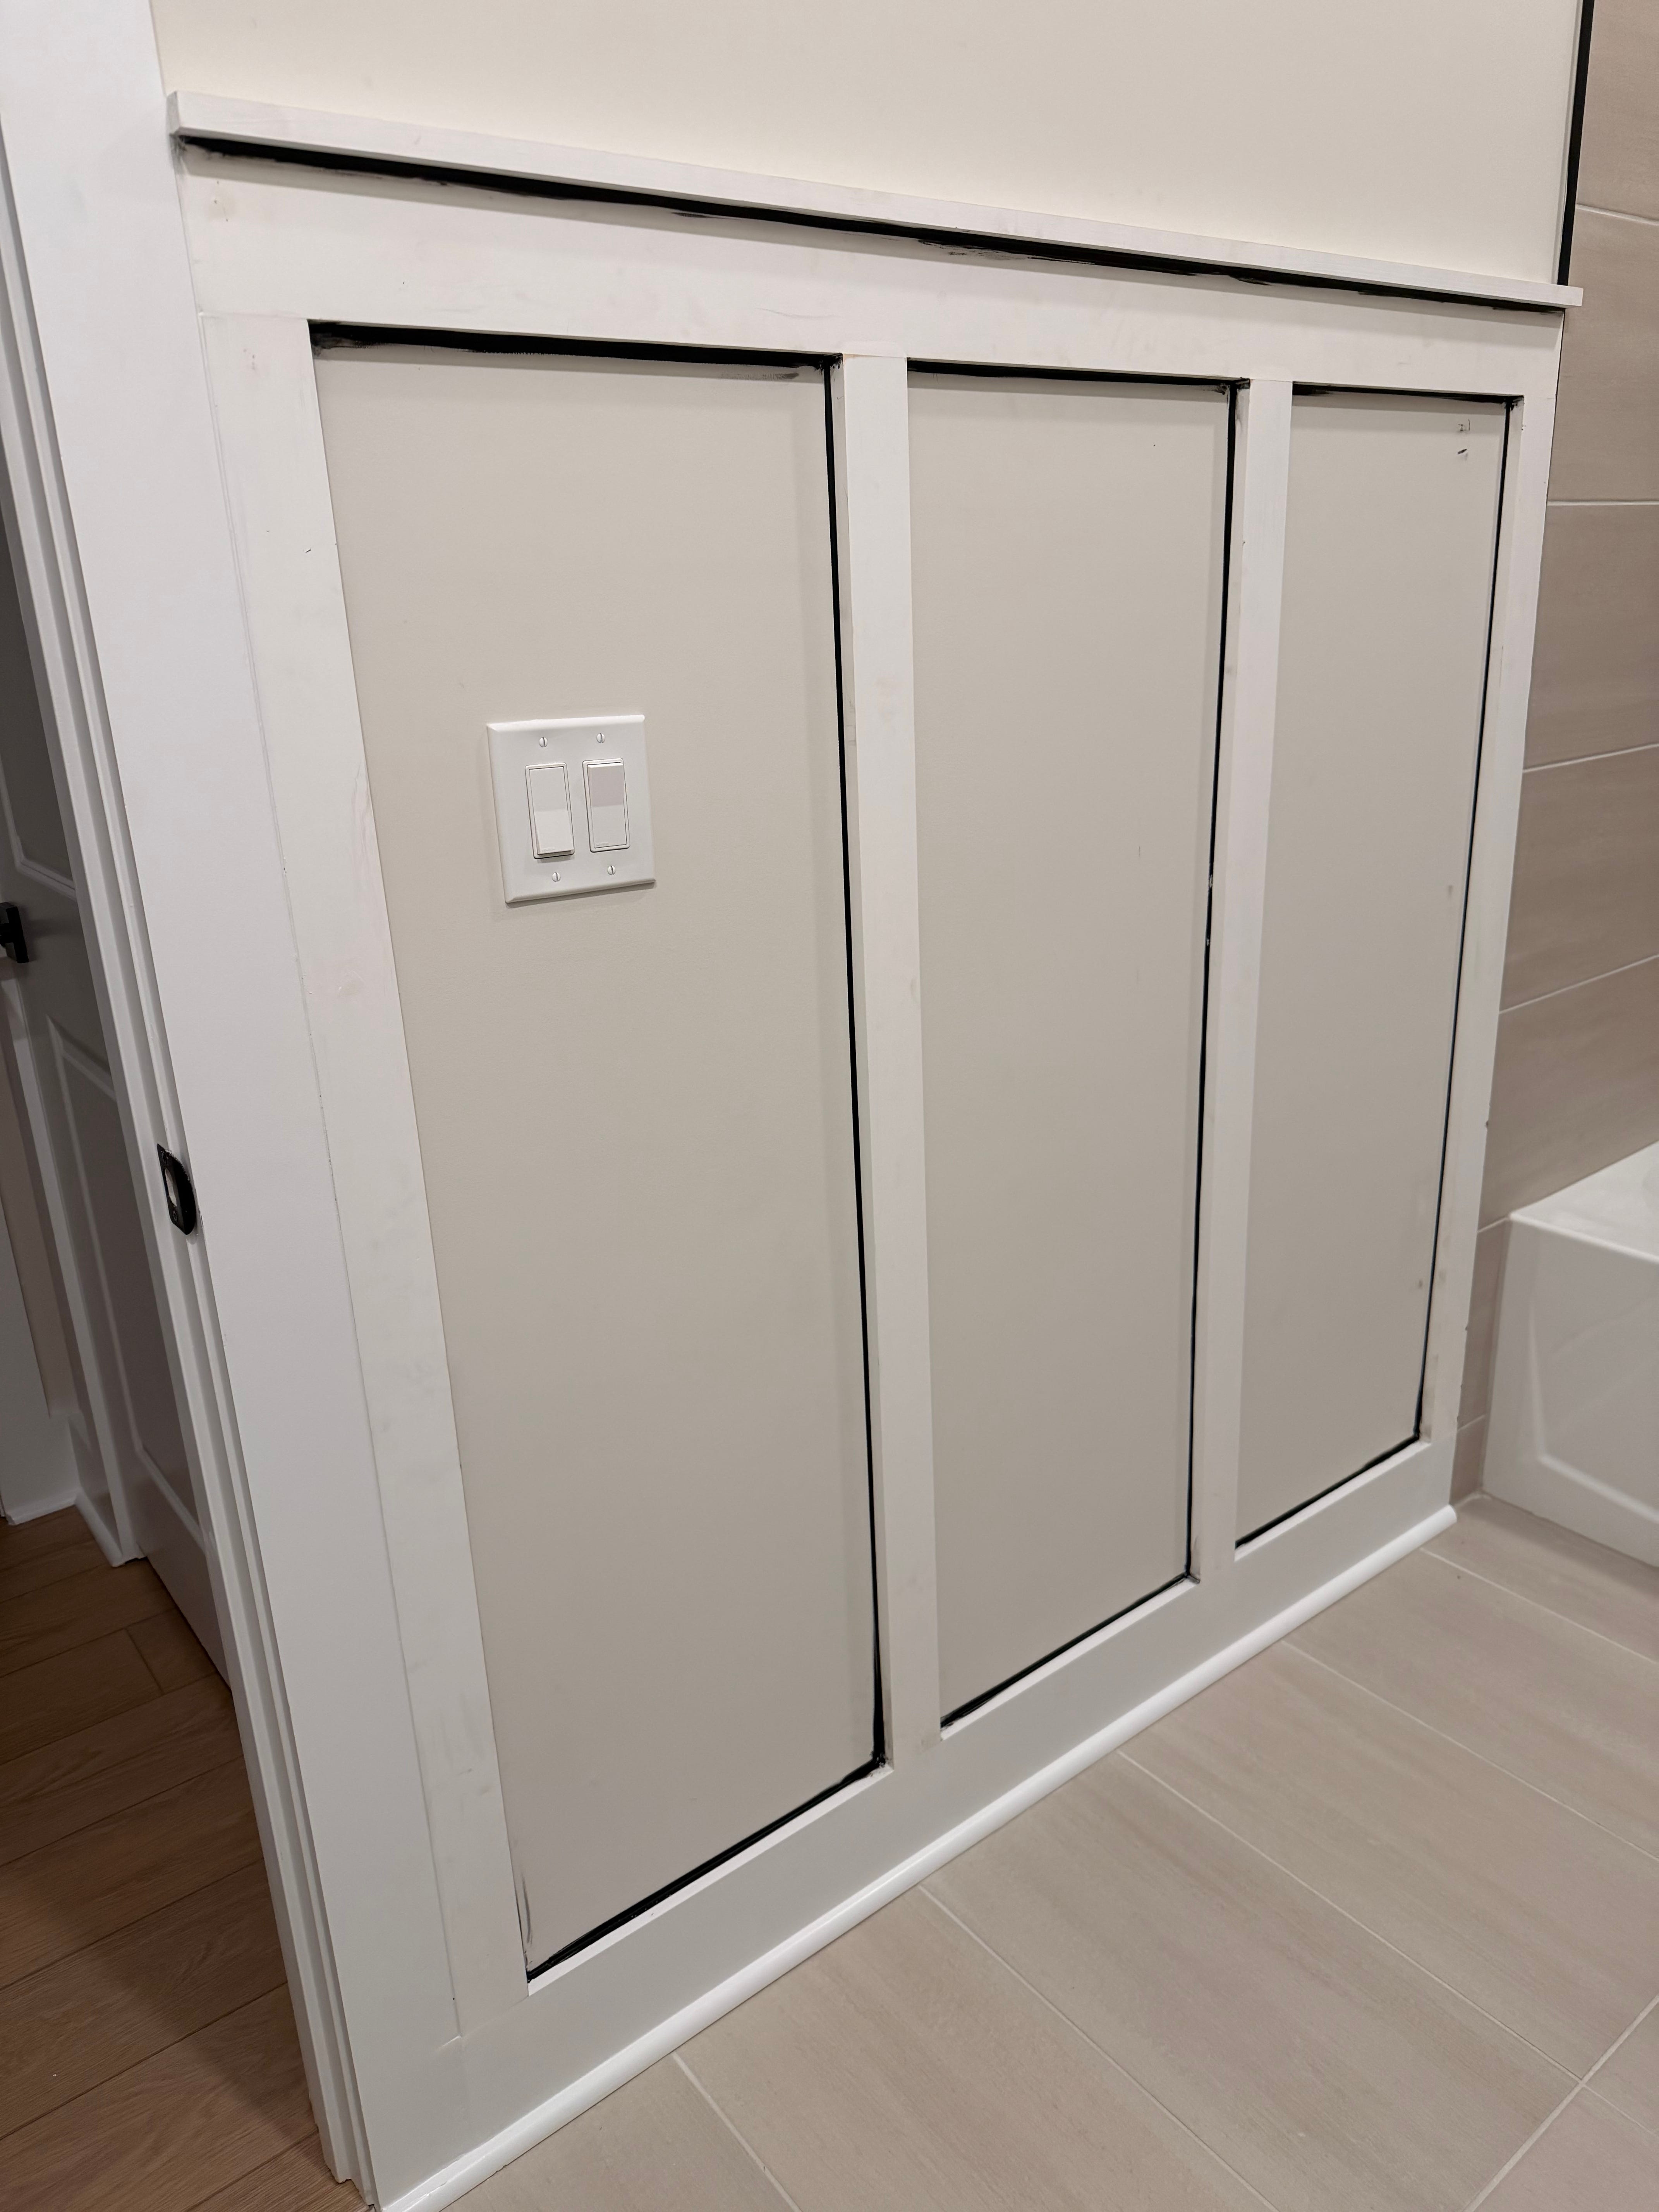
6. Caulk
I caulked:
- The top edge where the ledge meets the wall
- The side where the battens meet the door frame
- The side where the battens meet the shower
- All areas where the battens meet and touch the wall.
I used:
- White caulk for edge against my door frame and on top of the 1×2 where it touches my wall.
- Black caulk for seams on the wall and battens touching each other (since I painted it dark)
But honestly, if I did this again, I would just use white everywhere. Black caulk is much harder to work with.
I just used a basic caulk gun and smoothed it with my finger. Nothing fancy.
7. Paint
I used a roller for most of it and a brush for detail areas.
- Color: Iron Ore by Sherwin Williams
- Coats: 2
I didn’t prime because:
- My boards were pre-primed
- My walls are new
If your walls are older or your boards aren’t primed, definitely prime first.
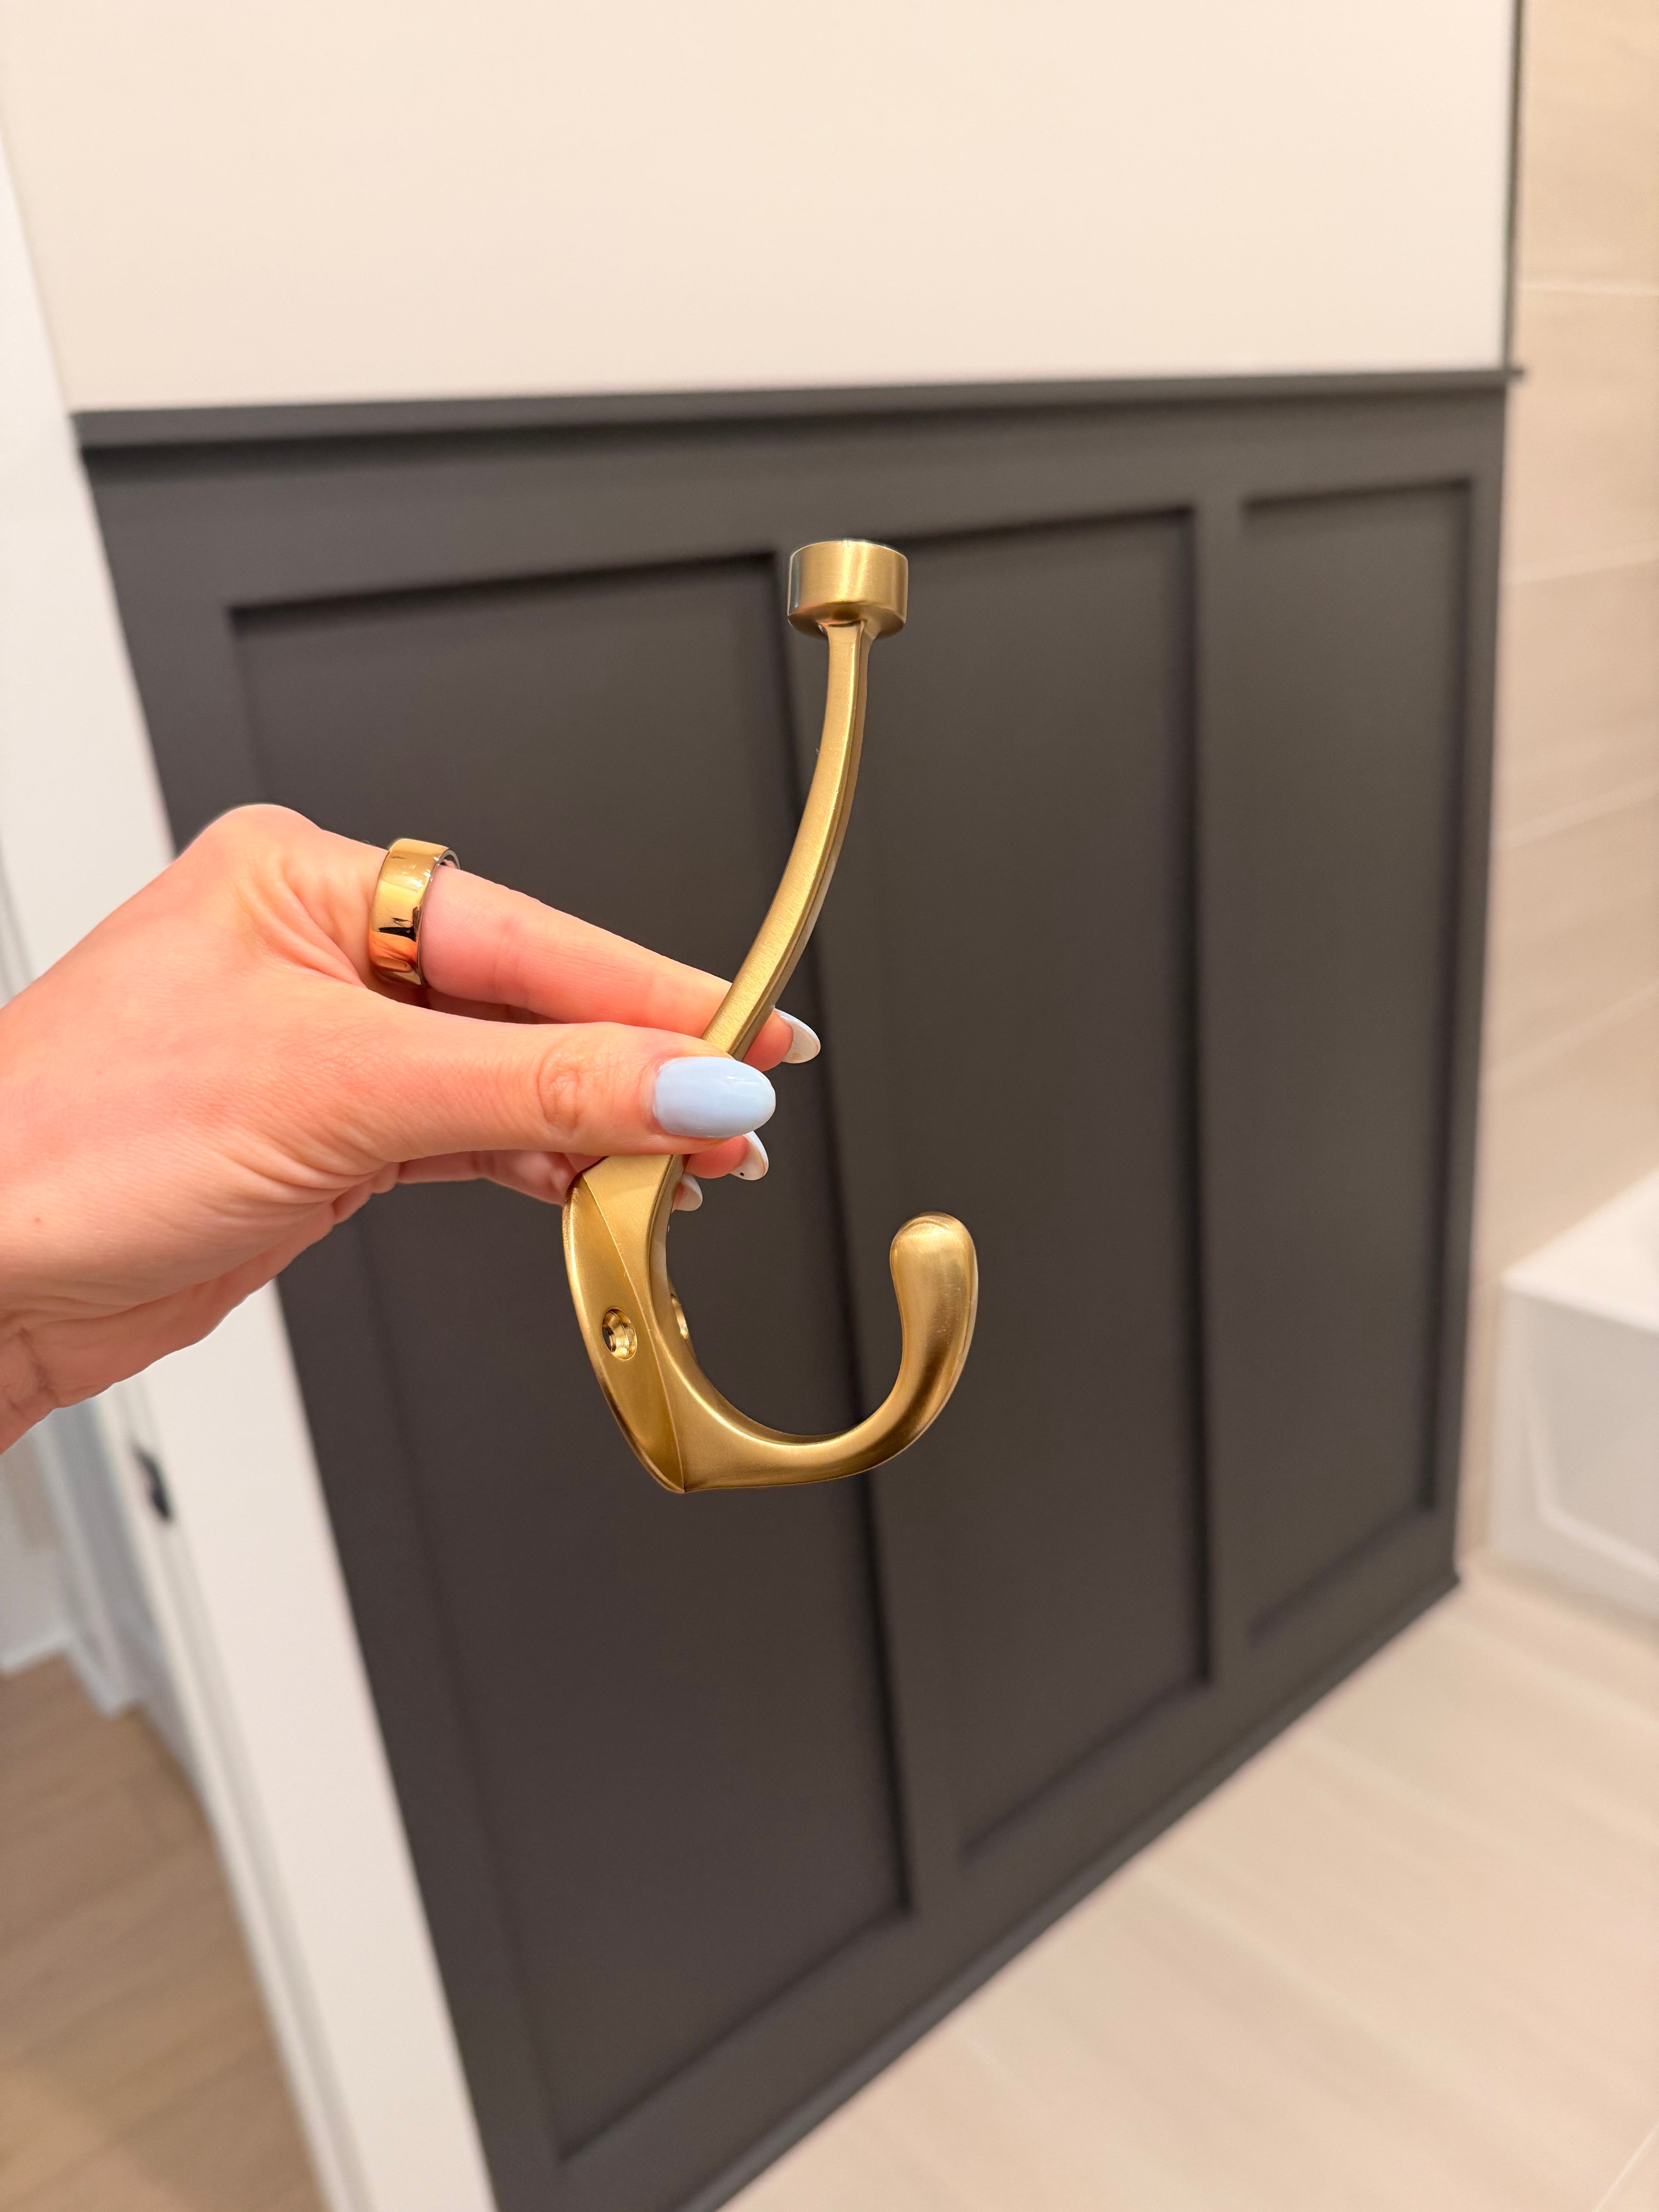
8. Add Hooks
Last step was installing hooks for towels.
I used these brass hooks from Amazon and they matched my cabinet hardware perfectly!
I screwed them directly into the 1×3 board so they’re super sturdy for holding towels.
This took me 2 days total to allow time for proper drying
It completely changed the space, made the wall feel intentional, and added function at the same time.
Now I want to do this in my laundry room next!
If you’ve been wanting to try a DIY but feel intimidated, this is a really good project to start with!
DIY batten wall, bathroom accent wall, board and batten bathroom, DIY bathroom wall, batten wall tutorial, easy DIY home project, beginner DIY wall project, bathroom wall ideas, modern accent wall, board and batten tutorial, DIY home improvement, wall molding ideas, budget bathroom update