
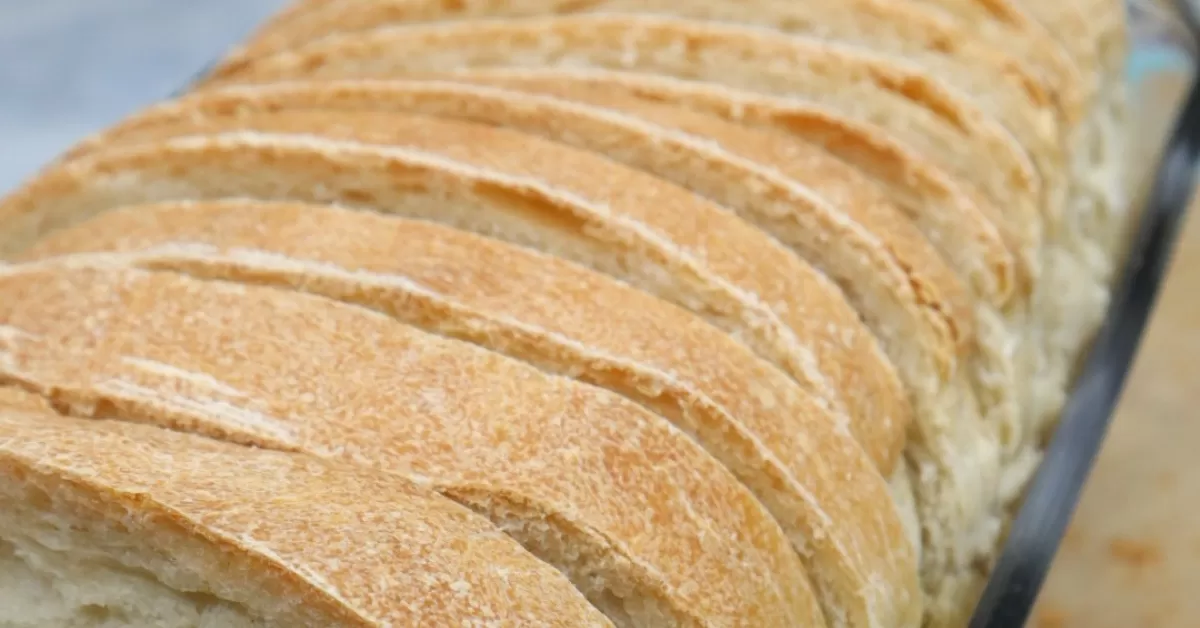

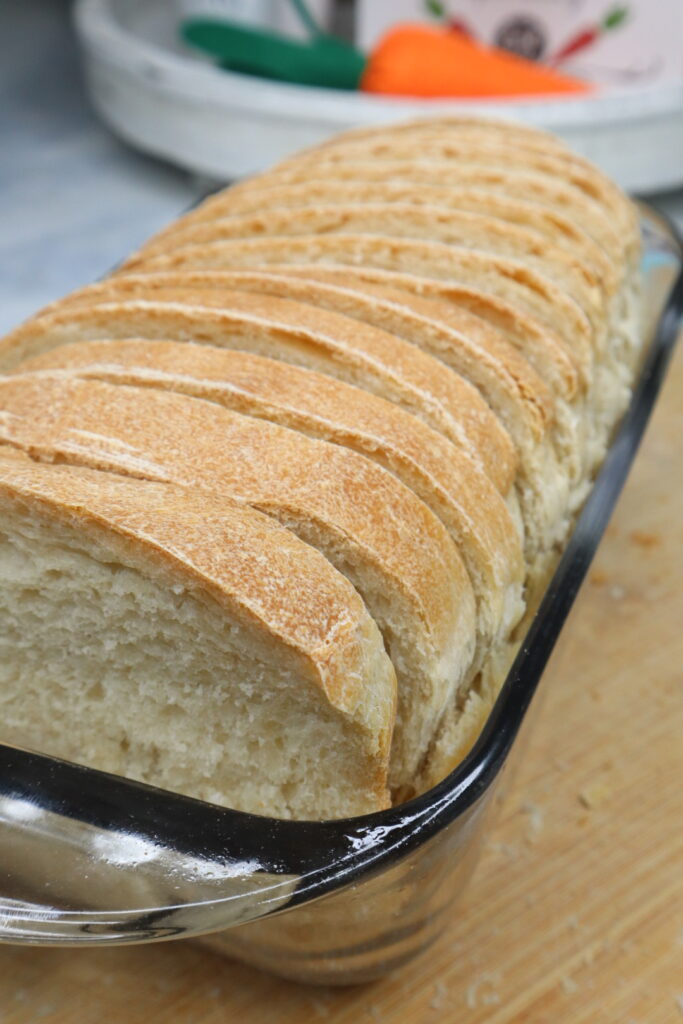
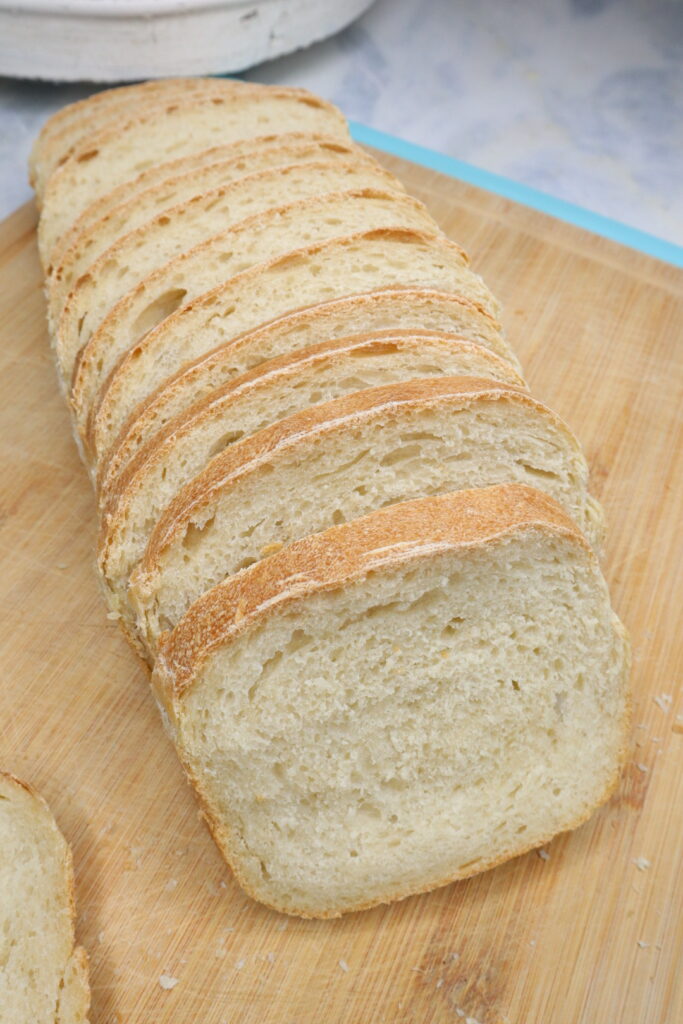
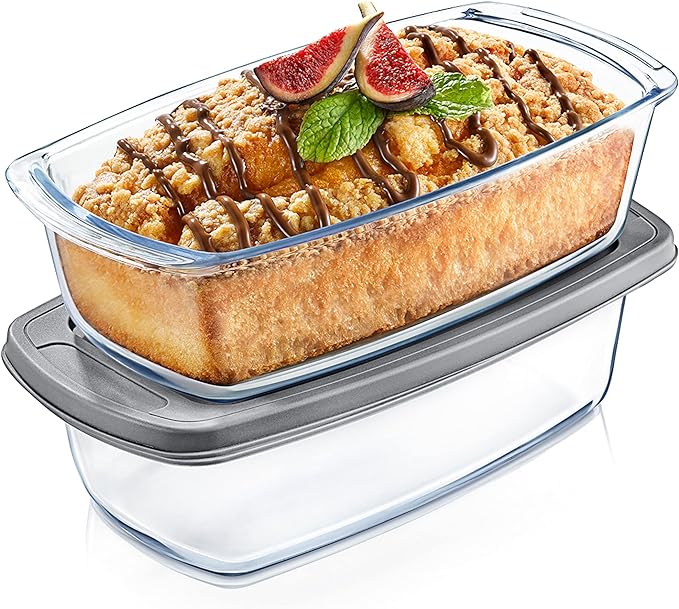
If you are new to sourdough, or just can’t be as hands on to knead your dough throughout the day, this is the perfect recipe for you! This overnight sourdough sandwich loaf only requires one set of stretch and folds and then all you have to do is go to bed & let it do its magic!
Sourdough has SO many health benefits. Making homemade bread from scratch is truly life changing. You are avoiding so many preservatives, chemicals, flavor enhancers, sugar, and inflammatory oils found in store bought bread. Plus, it is so much fun to make! If you want to learn how to make a classic sourdough loaf from scratch, you can find the recipe here. Happy baking! Never hesitate to send me a DM on Instagram if you have questions!
BE SURE TO SAVE THIS RECIPE TO YOUR FAVORITE PINTEREST BOARD FOR LATER!
Why You Should Be Eating Sourdough Bread
Easy to Digest
The bacteria-yeast composition will start to breakdown the starches found in the grains before it even reaches your stomach!! Most of the work is done before you consume, making it much easier on your gut.
Lower Glycemic Index
Sourdough is fermented in a way that depletes bad starches within it. Your blood sugar won’t rise drastically upon eating it.
Better for Gluten Sensitivity
The longer fermentation time for sourdough bread means that much of the protein gluten is broken down into amino acids before you consume it.
Provides Healthy Bacteria
Sourdough bread is fermented in a way that fosters more beneficial bacteria in the bread and in your body when you eat it.
Made with 3 Simple Ingredients
Unlike store bought breads, real sourdough contains only 3 clean ingredients. Flour, water, and salt (I like to add a lil organic honey too 🤪) And when you make it from scratch there are no preservatives!!!
Macros & Nutrients
Sourdough is packed with nutrients, healthy carbs, protein, fiber, iron and vitamins like potassium, folate & vitamin B. It is not crazy high in calories either.
Doing Good for the Environment
Another reason why I love making my homemade sourdough from scratch is because it is better for the environment/more sustainable! I try to reduce my paper & plastic use as much as possible. I store my bread directly in my Dutch oven with the lid on my counter!
How to Make an Organic Sourdough Starter from Scratch
- 50g organic, all-purpose flour
- 50g warm filtered water
- Large mason jar – make sure it is large because your starter will GROW! Mine is 32 ounces.
- Mix the flour and starter in your mason jar until fully incorporated (it needs to be mixed very well!).
- Cover loosely with the mason jar lid. Store in a warm environment for 24 hours. I like to store mine in the oven which is a little bit warmer of a temp with no air flow. Don’t accidently turn your oven on though lol!
- Repeat this process every 24 hours for 4 days and on day 5 or 6 (can vary depending on your kitchen), it should very very bubbly and ready to use! Cooler kitchens can be closer to the 7 day mark. Take a spoonful or two out of what is in your jar before feeding it each time to keep it healthy. Taking some out (discarding) allows for the healthy bacteria to grow & helps prevent overflowing.
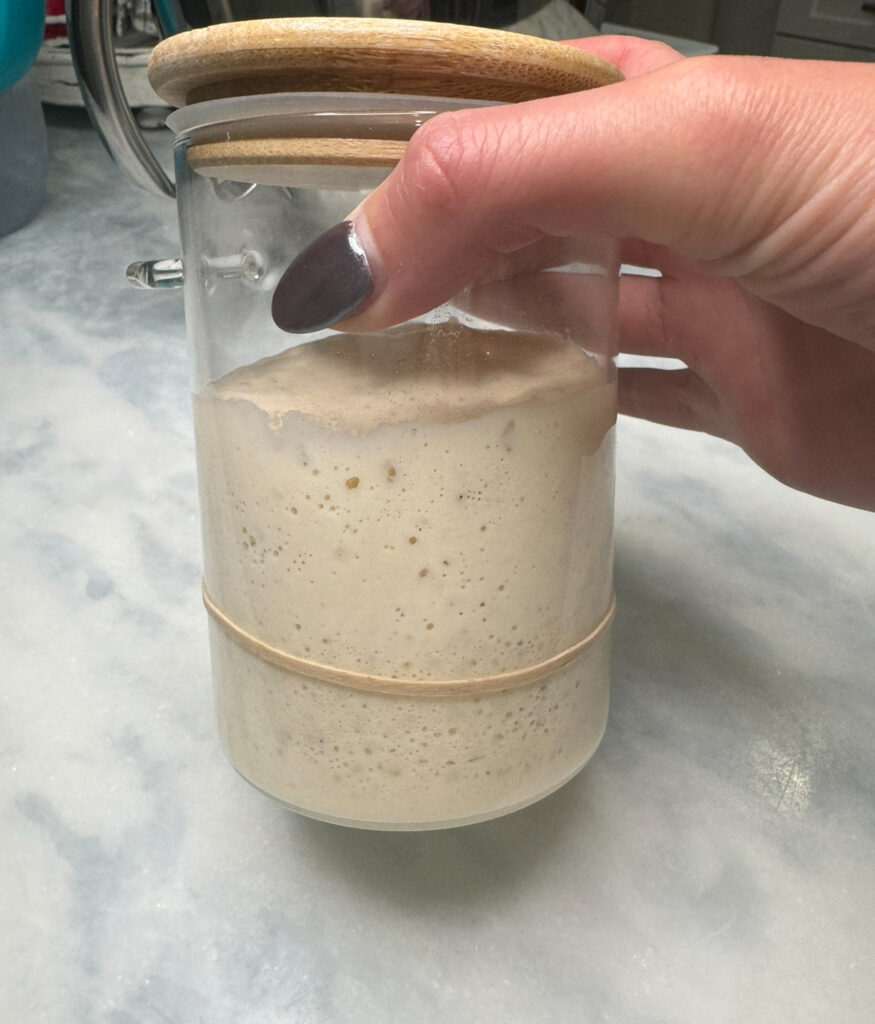
- Use your starter in your bread when it is at its peak (a little more than double in size). I will include pictures below of what this looks like.
What Your Starter Should Look Like When It Is Ready
Your starter is ready after feeding it when it grows in size by double (or slightly more), is bubbly, and kind of dome shaped at the top.
Once the top starts flattening out, that means the starter is starting to fall back down.
I mark where my starter is at with a rubber band after feeding it to easily see how much it has grown by.
Once your starter is going, best practice is to feed it equal parts starter, flour, and water. Keep your discard for discard recipes!
How to Care for your Starter
I know this sounds kind of silly, but your starter is like a little child! You have to take really good care of it to keep it alive. The longer it is alive and you keep it going, the stronger the sourdough taste you get! I legit had a sourdough starter baby sitter when I went to Europe for a month. Some people will dehydrate their starter too if they are going to be gone for a while.
If your starter is stored in the fridge (after you get it going of course) you only need to feed it every 7-10 days to keep it alive. If you store it at room temperature, it needs to be fed every 24 hours. Unless you plan on making a loaf of bread every day, I don’t recommend keeping your starter on the counter. It will grow faster than you can make bread! Storing it in the fridge slows it down and makes it more manageable. I make one or two loaves per week.
Overnight Sourdough Sandwich Bread Ingredients
I HIGHLY recommend measuring your ingredients in grams. It is going to be most accurate and give you the same results every time. I will put the approximate cup measurements too, but just keep in mind that everyone’s cups/teaspoons are not exactly the same but weight is always the same.
- 65 grams (apx. 1/2 cup) of bubbly active organic sourdough starter
- 300 grams (1 1/3 cup) of warm, filtered water (80-85°F is best but no more than 95). Do NOT use reverse osmosis or distilled water. It lacks the beneficial bacteria needed to grow.
- 40g (apx. 2 tbsp) raw, organic unfiltered honey
- 20g (apx. 1 1/2 tbsp) organic, extra-virgin olive oil
- 10g (apx. 2 tsp) salt
- 500 grams ( apx. 4 cups) of organic bread flour – There are SO many flour variations you can do. Feel free to experiment a bit and add in some rye, wheat, etc. too.
How To Make Sourdough Bread
Remember, if you need a visual, click on the link to my Instagram reel below to see it step by step!!!
- Add the starter, warm water and honey to a large mixing bowl, stirring until dissolved. Add bread flour, oil, and salt. Stir until a thick, shaggy dough forms and all the flour is absorbed. You can use a KitchenAid mixer with a dough hook attachment, a dough whisk, or do this by hand!
- Cover with a clean, damp kitchen towel and let the dough rest for 30 to 45 minutes.
- Gently lift dough from the bowl and stretch and fold the dough 4 times. To do a stretch and fold, stretch the dough up until it feels tight and then push it down the middle. Turn the bowl and repeat 3 more times (until you have make a complete circle).
- Cover with a damp towel, and let rise at room temperature overnight (8-10 hours) until doubled in size. Do not refrigerate the dough.
- In the morning, flour your counter top. Remove the dough from the bowl, gently stretching it into a rectangle. Then, dimple the with your fingers to release any large air bubbles from the dough. fold two halves of the rectangle in and roll up the dough into a log shape. Cover and let the dough rest for 10 minutes.
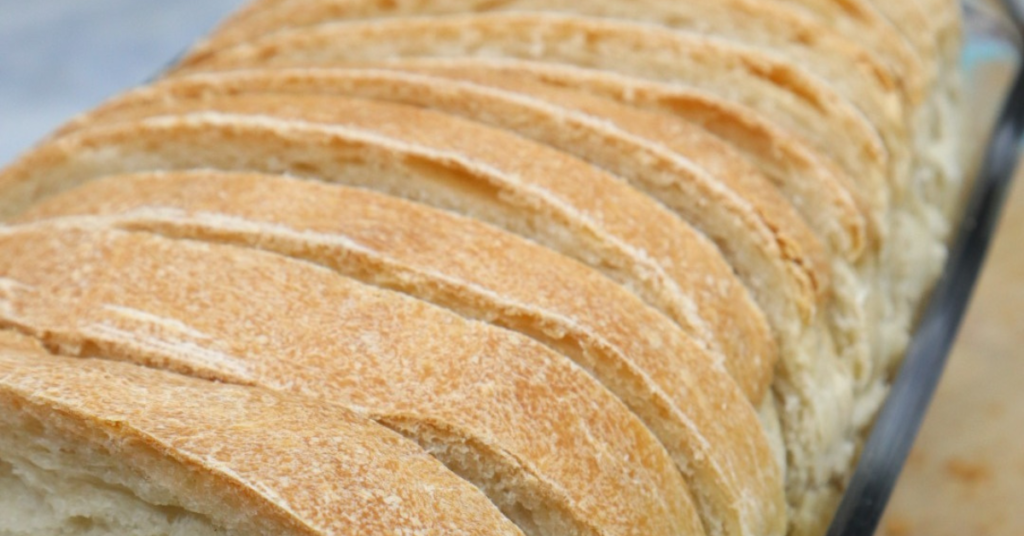
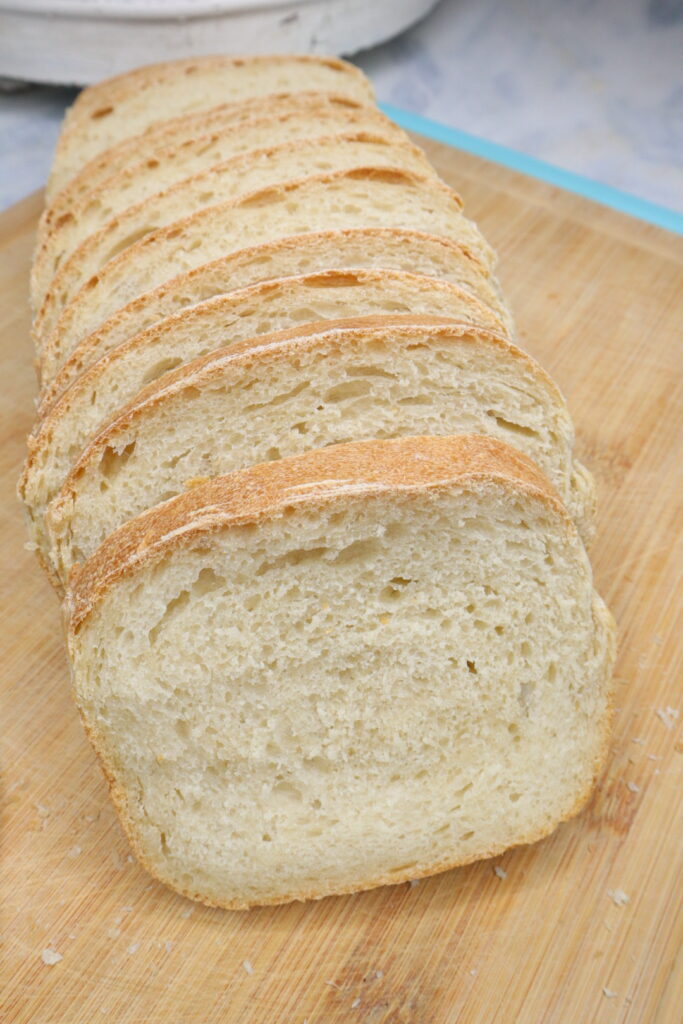
- Spray a 9×5 bread pan with cooking spray. Tighten the dough log by gently pulling it towards you along the counter top. Place the dough in your loaf pan. Cover and let rise for 1-2 hours, or until dough has doubled in size.
- Preheat your oven to 375°F. Bake in the center rack of the oven for 40 minutes. The top of the loaf should be golden in color.
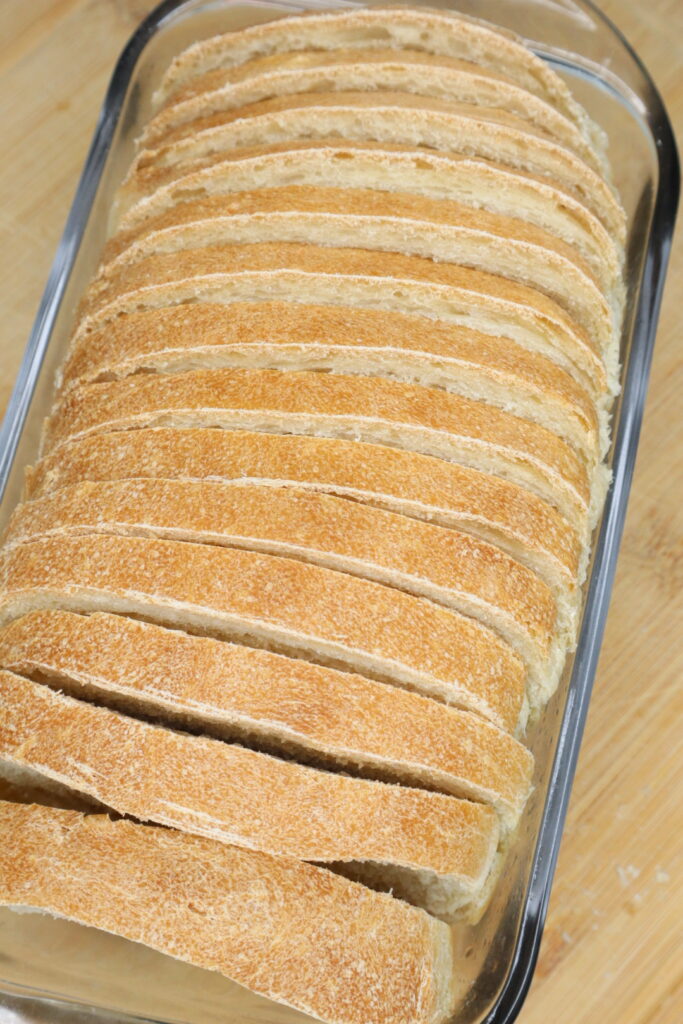
- After 10 minutes, tilt the pan to remove the bread. Cool on a cooling rack. Brush the top of the loaf with some butter if you’d like. Wait at least 1 hour before cutting to prevent the loaf from deflating.
Feel-Good. Taste-Good Food.
Sourdough Sandwich Loaf Essentials
Here are the essential tools you should get to make this sourdough recipe!
Loaf Pan
Any standard 9×5 loaf pan will work. I like this one with the lid!

Scale
A handy dandy scale for measuring! Grams are more accurate than cups when it comes to baking things like bread and they are super cheap.

Large Mason Jar
For your sourdough starter

KitchenAid Mixer
You don’t have to have one, but it sure makes it easy when you are mixing your dough. If you don’t have one or it’s out of your price range you can mix your dough by hand or a dough whisk.

Dough Hook
If you choose to mix your dough by hand, this is a great tool to use!
How To Store Leftovers
I leave my leftovers in my bread pan covered, or you could also use a bread bag. You can also freeze any leftovers for up to 6 months if you can not finish the entire loaf in enough time.
Check Me Out on Social Media
I post all my recipes on social media as well and you can stay up to date on what I am up to! Also, I love seeing people try my recipes! When make these, snap a picture, and share it to your socials. Tag @cookingkatielady and #cookingkatielady so I can admire your masterpiece and share with others!
Overnight No Knead Sourdough Sandwich Bread
Description
If you are new to sourdough, or just can't be as hands on to knead your dough throughout the day, this is the perfect recipe for you! This overnight sourdough sandwich loaf only requires one set of stretch and folds and then all you have to do is go to bed & let it do its magic!
Ingredients


Instructions
-
Add the starter, warm water and honey to a large mixing bowl, stirring until dissolved. Add bread flour, oil, and salt. Stir until a thick, shaggy dough forms and all the flour is absorbed. You can use a KitchenAid mixer with a dough hook attachment, a dough whisk, or do this by hand!
-
Cover with a clean, damp kitchen towel and let the dough rest for 30 to 45 minutes.
-
Gently lift dough from the bowl and stretch and fold the dough 4 times. To do a stretch and fold, stretch the dough up until it feels tight and then push it down the middle. Turn the bowl and repeat 3 more times (until you have make a complete circle).
-
Cover with a damp towel, and let rise at room temperature overnight (8-10 hours) until doubled in size. Do not refrigerate the dough.
-
In the morning, flour your counter top. Remove the dough from the bowl, gently stretching it into a rectangle. Then, dimple the with your fingers to release any large air bubbles from the dough. fold two halves of the rectangle in and roll up the dough into a log shape. Cover and let the dough rest for 10 minutes.
-
Spray a 9x5 bread pan with cooking spray. Tighten the dough log by gently pulling it towards you along the counter top. Place the dough in your loaf pan. Cover and let rise for 1-2 hours, or until dough has doubled in size.
-
Preheat your oven to 375°F. Bake in the center rack of the oven for 40 minutes. The top of the loaf should be golden in color.
-
After 10 minutes, tilt the pan to remove the bread. Cool on a cooling rack. Brush the top of the loaf with some butter if you'd like. Wait at least 1 hour before cutting to prevent the loaf from deflating.
Nutrition Facts
Nutrition Facts
Servings 15
Serving Size 1 slice
- Amount Per Serving
- Calories 150kcal
- % Daily Value *
- Total Fat 1.4g3%
- Saturated Fat 0.2g1%
- Sodium 310.1mg13%
- Total Carbohydrate 28.3g10%
- Dietary Fiber 1.2g5%
- Sugars 3.4g
- Protein 4.7g10%
* Percent Daily Values are based on a 2,000 calorie diet. Your daily value may be higher or lower depending on your calorie needs.
Note
Did you make this recipe?
The next time you make it, snap a picture, and share it to your socials. Tag @cookingkatielady and #cookingkatielady so I can admire your masterpiece and share with others!:)
Please note that my nutrition label is approximate and can have slight rounding.

User Reviews
Second try at sourdough bread first attempt different recipe went straight in the bin tried your recipe and goodness lovely sourdough bread Thankyou
Hi Lynne!
Yay, I am so glad it worked out for you!
Great for sandwiches!!
Hey Terri – It is 10 grams of salt (2 teaspoons apx). Sorry there was a typo in there!
I dont understand the 10 grams of salt equivalent to 15 grams?